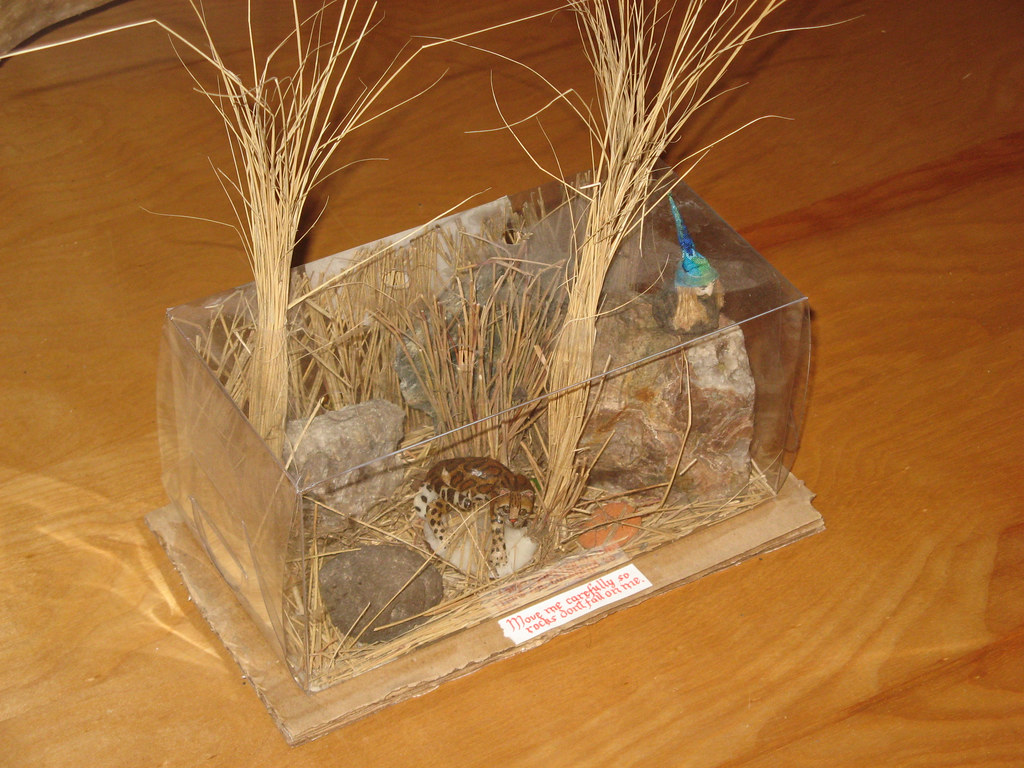
My dad, Ken Erickson, travels frequently to South and Central America to explore small towns and other places mostly untouched by tourists. He brought me an ocelot skillfully and ornately carved out of a nut and painted from his 2008-2009 trip to Panama. I was so impressed by the thing that I made an craft project out of it with my mom, Ester Tejeda. I used a plastic box which contained candles, adding some rocks and dried grasses using white glue. The rocks are loose inside the box, so I used a calligraphy pen to make a little sign to warn people that might pick it up. The tiny wizard sitting on the rock is from Chile made from a eucalyptus nut. Lastly, I suspect that at least one of the rocks was acquired abroad but I don’t remember now (one of them is volcanic, for example).

Tatamibari is a game published by Japanese game company, Nikoli. We are given a grid and some of the squares contain a symbol; either + or - or |. The player must partition the grid with line segments drawn on grid lines so that
- Each partition contains exactly one symbol.
- Every partition is rectangular.
-
update: I left this condition out. No four rectangular regions may meet
(this is the tatami condition!)
- Partitions with a + are square shaped.
- Partitions with a - are wider than they are tall.
-
Partitions with a are taller than they are wide.
Here is an example puzzle and solution:
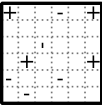
Fun puzzle, right?
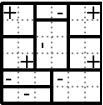
Here is the real question: How do you generate puzzles with solutions?
Take this one, for example, which obviously has no solution.
So we can’t just scatter the symbols onto the grid randomly. As far as I know this problem is open:
What are the necessary and sufficient conditions for solvability of one of these puzzles?
And this one might be open too:
What is the hardness of finding a solution?
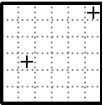
update: I should point out that one can always construct a puzzle by partitioning into rectangles and inserting the appropriate symbols.
Rachel Peters is an artist, performer and animator and filmmaker. Raised by bumblebees in an old abandoned mineshaft, Jack Rachel learned all of her trades as a court jester to the Queen Bee. Now and then the Queen would get tired of a jester (or a couple) and have them "repurposed" (Yes, now I'm just making this up). Initially repulsed by the procedure, Rachel eventually became fascinated by the way a few old, unwanted bees could be be transformed into brand new hilariously transformed into very entertaining Frankenstein bees!
After years of incubation (of the idea), Rachel has applied this idea to vintage toys and made these works of art available at Etsy and some new designs on her website. These little (must they always be little?) critters are one-of-a-kind and up for adoption by any queen bee with about 25-100 bucks.
Warning: Franken Toys may contain traces of
I bought this boat just over a year ago and I’m nearly ready to bring it to the water. Here is a video giving a tour of new rigging.
The kayak is a Pygmy Coho wood kit which someone built in Campbell River, BC. I bought it from him on Craigslist and have been using it as a kayak. Someone gave me a new sail and jib last year and, after sailing it once with the original rigging, I decided to change it up. It has taken this long to get a space to store the boat by the water, and now that I have one I’ve been very motivated to get the boat done!
The new sail was taller than the old one and as I was measuring things up, I decided it would be more fun to operate the boat from the side, rather than the cockpit. These two factors, plus the acquisition of a jib was a gigantic can of worms.
To begin with, the mast wasn’t tall enough and there was no place to fasten haliard blocks to the top. Secondly, the old rigging used the haliard and downhaul of the mainsail to pull the mast tight with the hull. With the size of the new sail I decided it would be best to have the mast stayed by cables and the haliards (now two of them) pulling on the ends of the mast. I also wanted to distribute the force of the mast into the crossbar, instead of fully into the bottom of the hull. The solutions, shown in the video, consist of a block of wood clamped to the base of the mast and a fiber glassed mast extension at the top, which also serves to hold the blocks and cable stays.
Benches were added, so I could sit up on the side. The Kayaks’s rudder used to be controlled by foot pedals in the cockpit. But I took care of that! I removed the pedals and modified the rudder, adding a tiller.
The boat also required a boom and the sail needed a reef. I made the boom out of a small dinghy mast and had the sail custom modified.

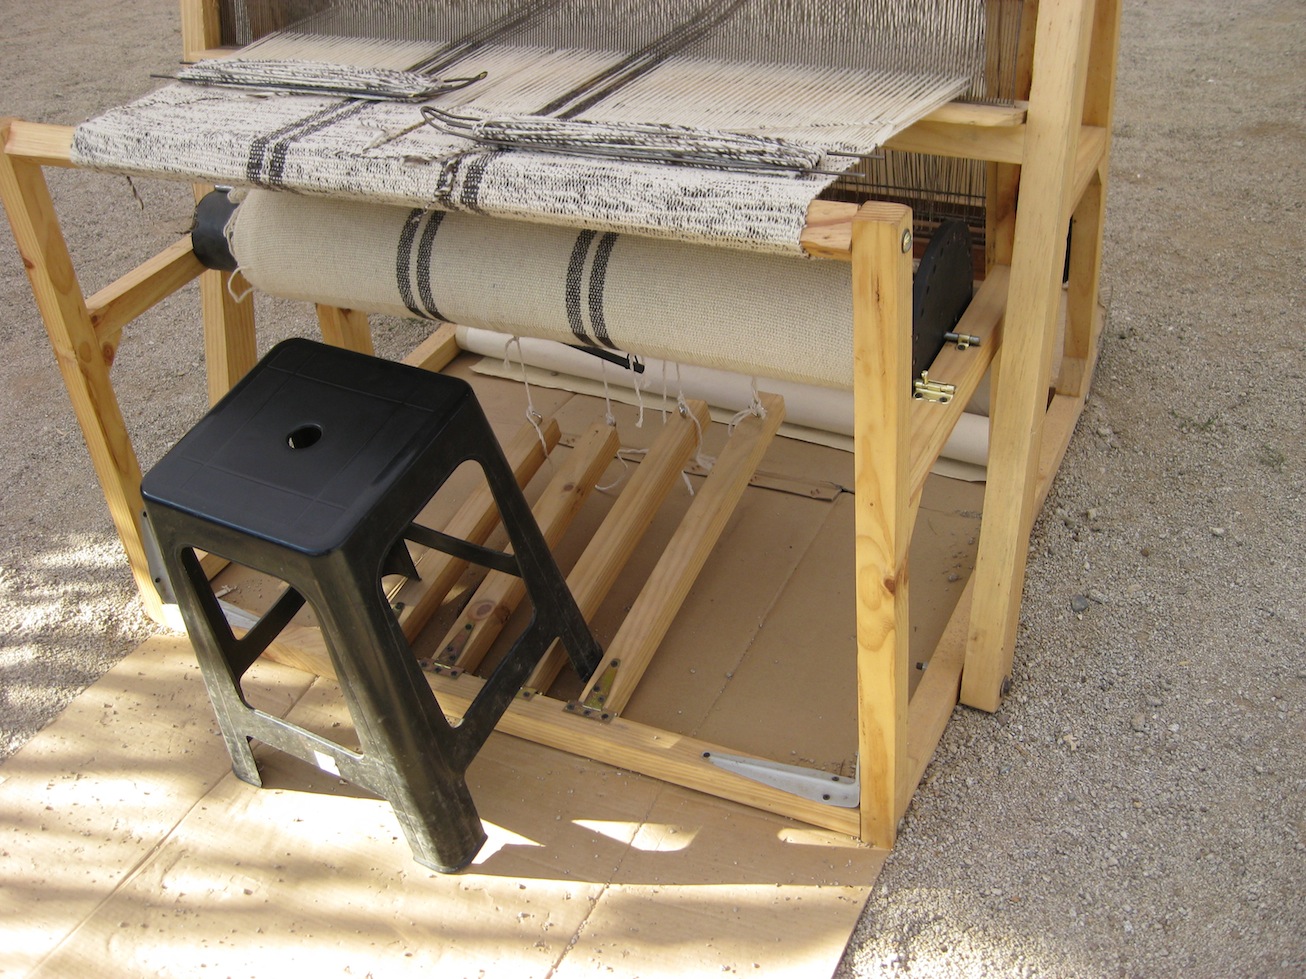
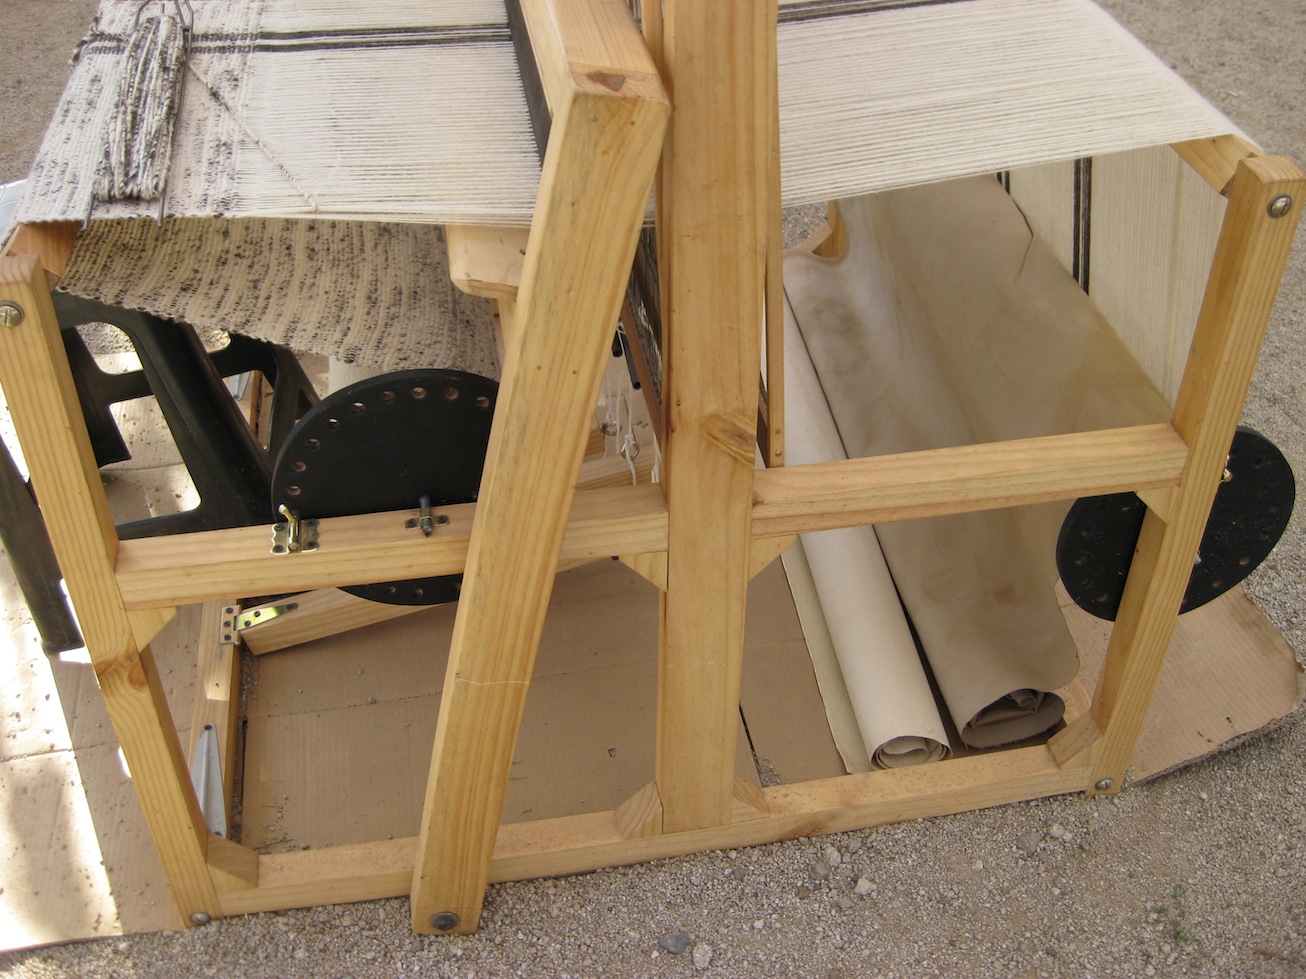
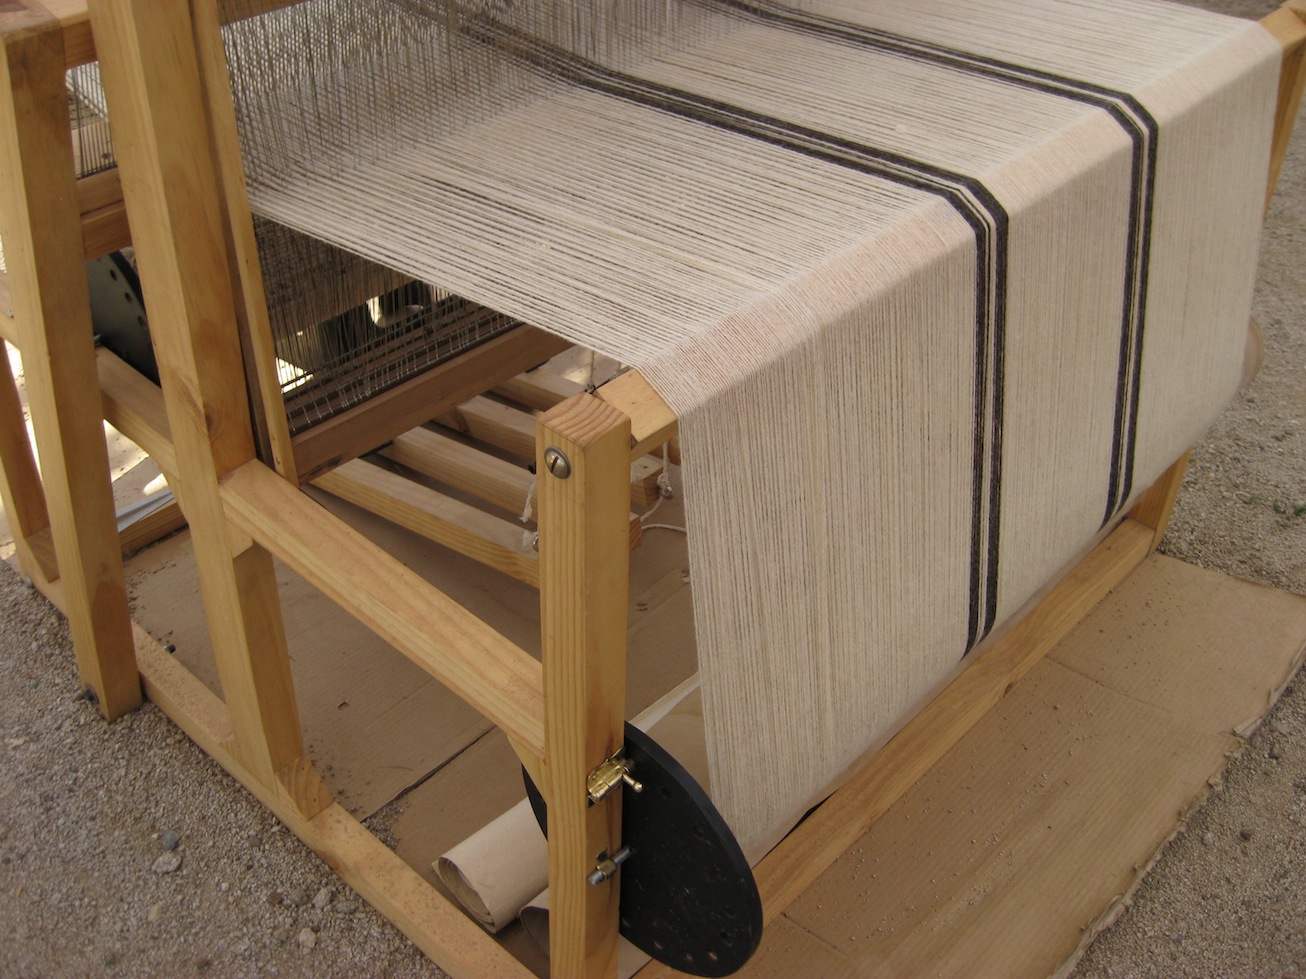
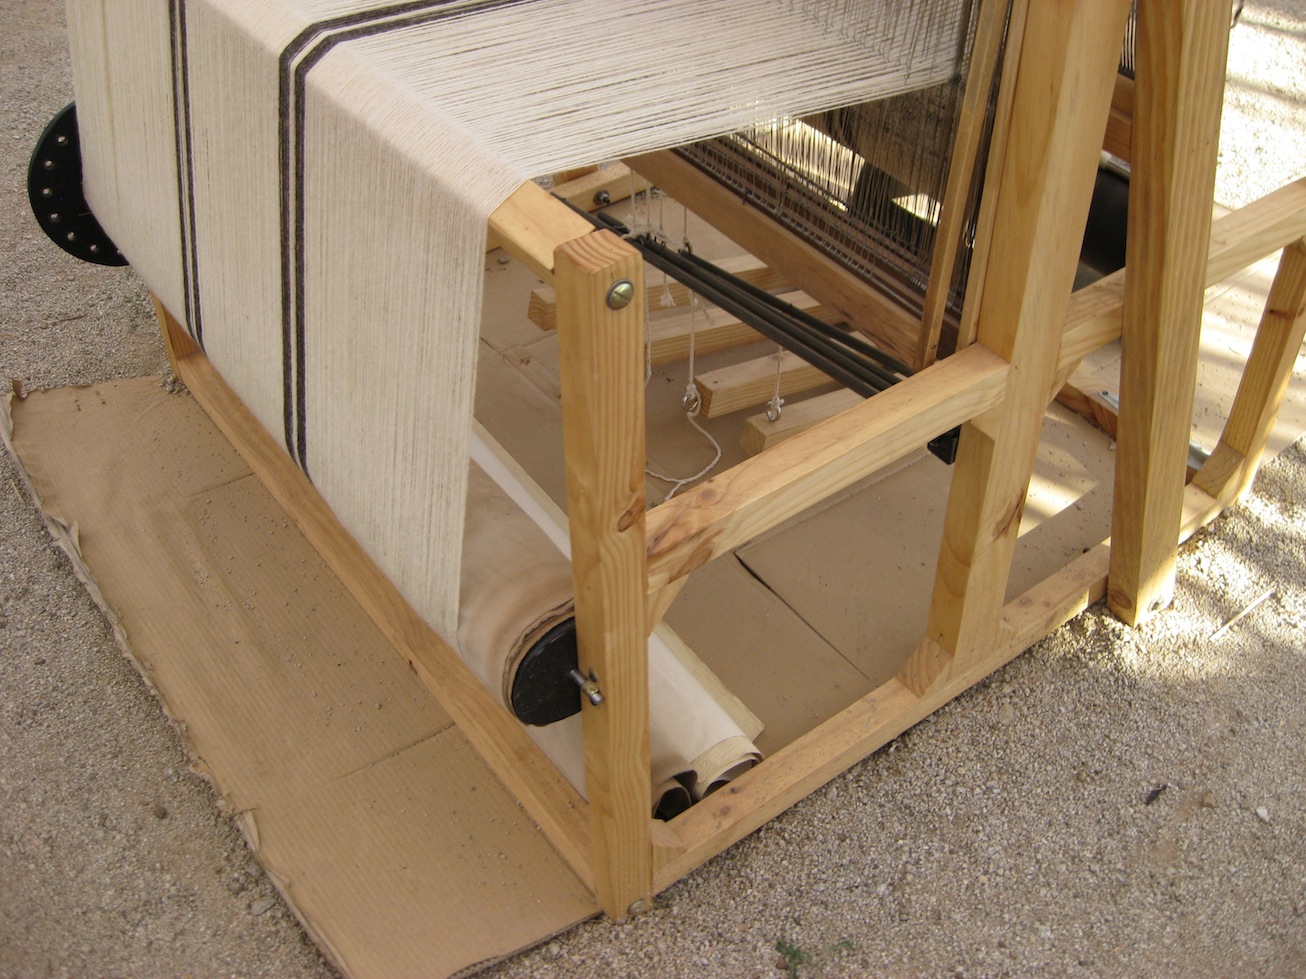
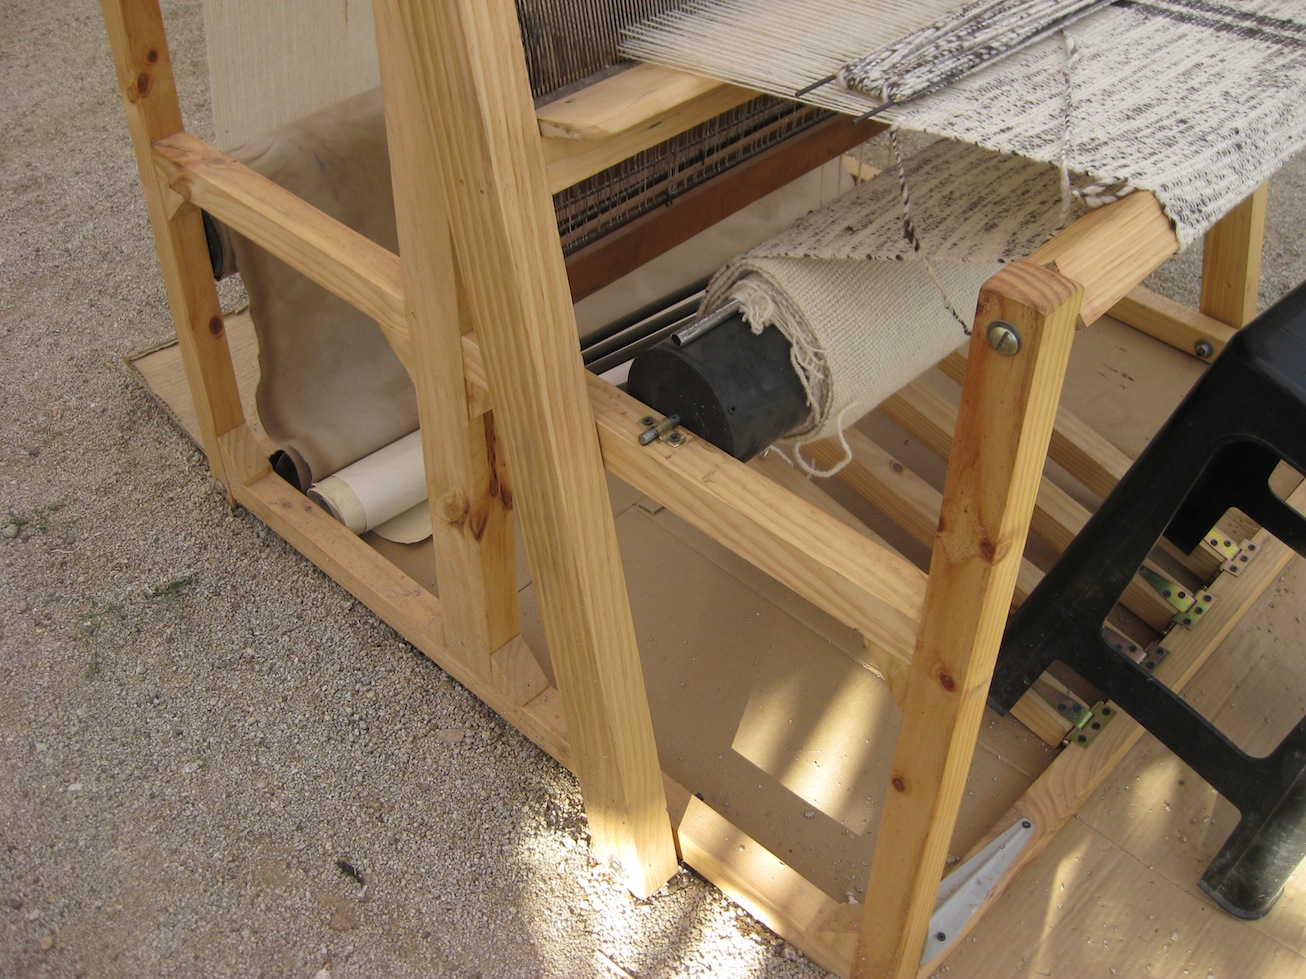
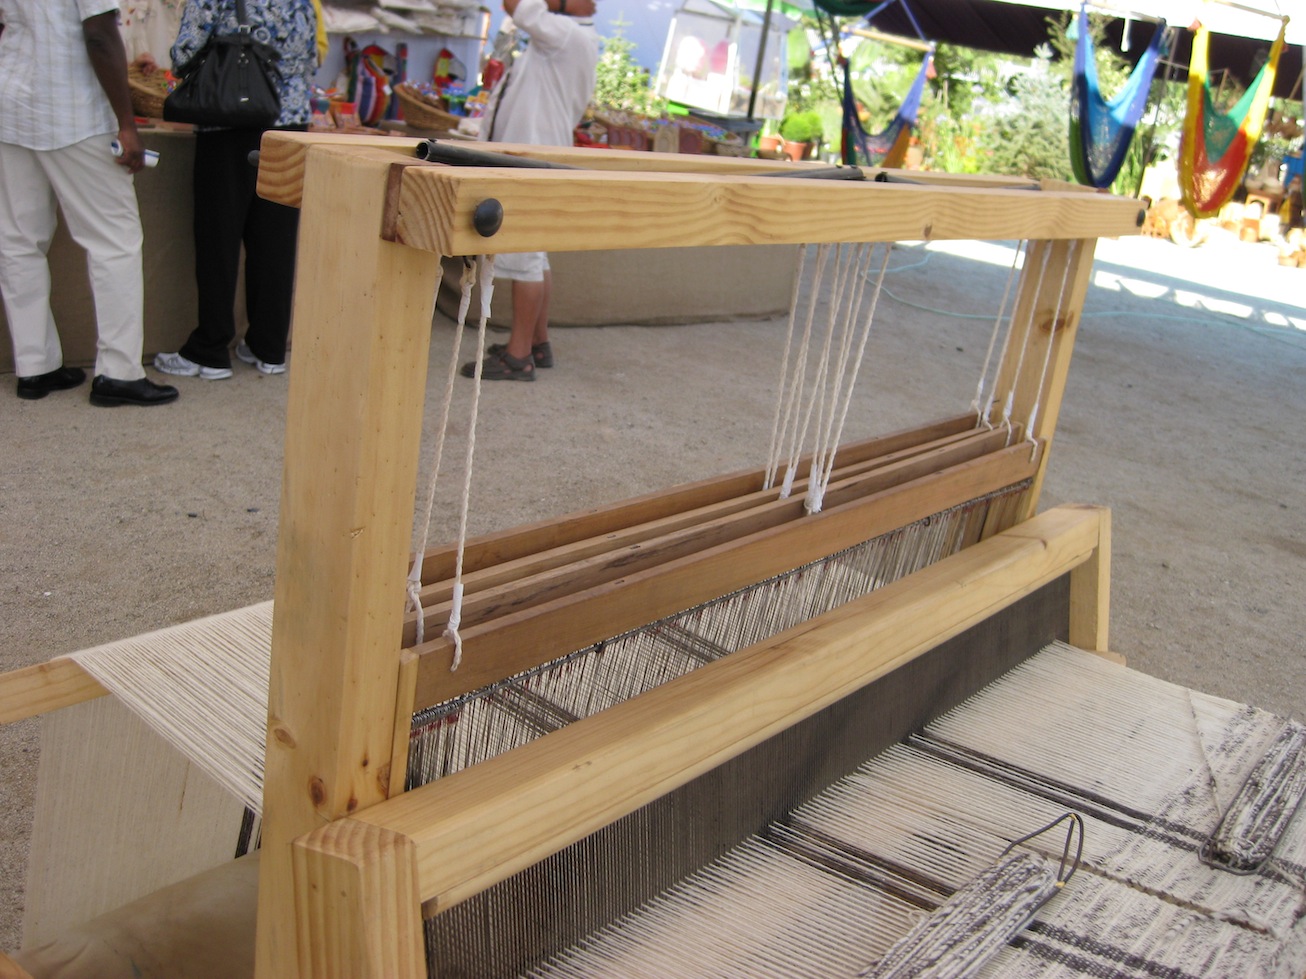
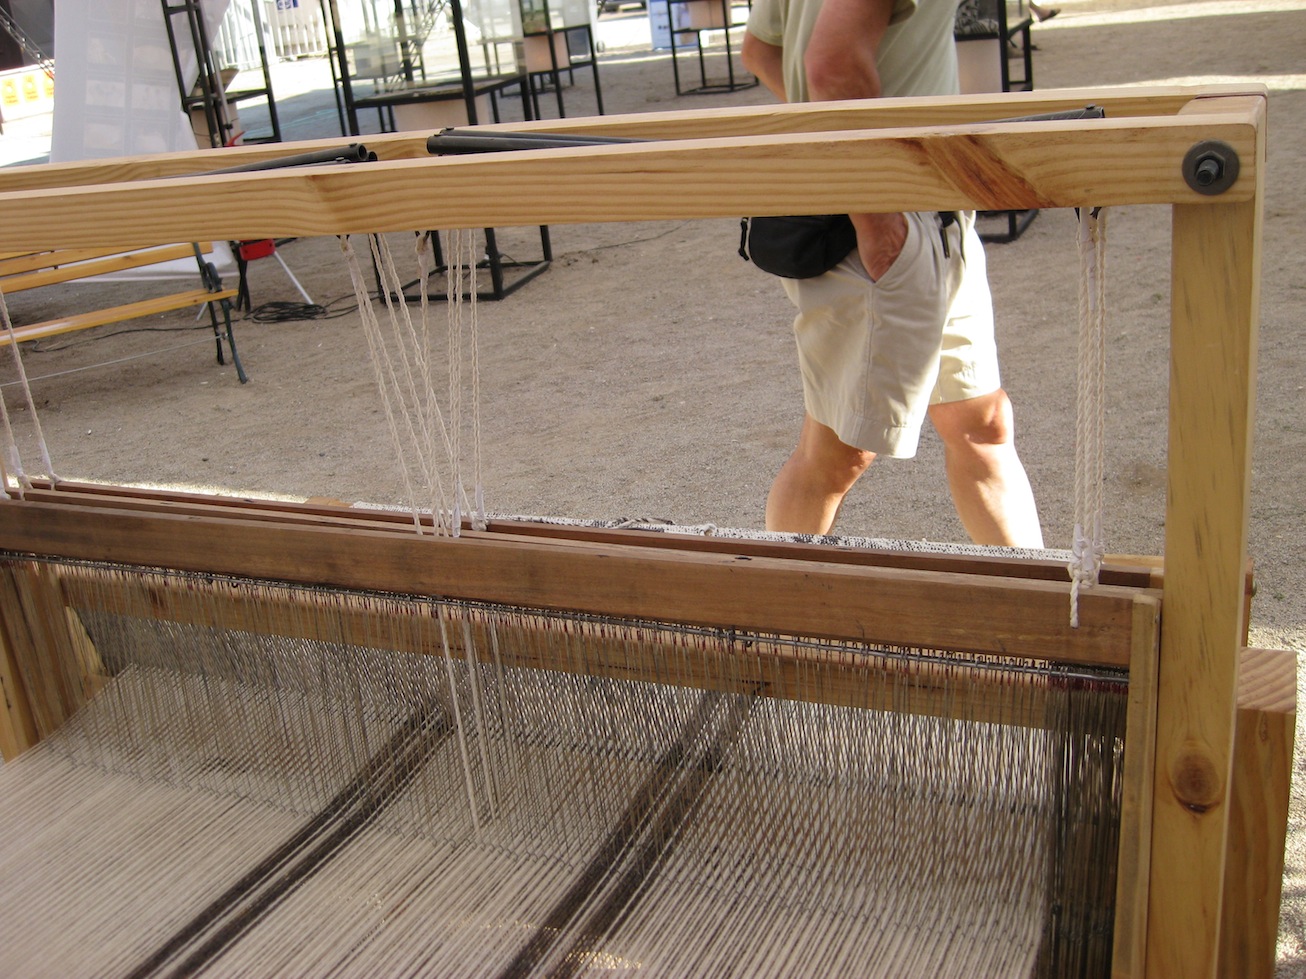
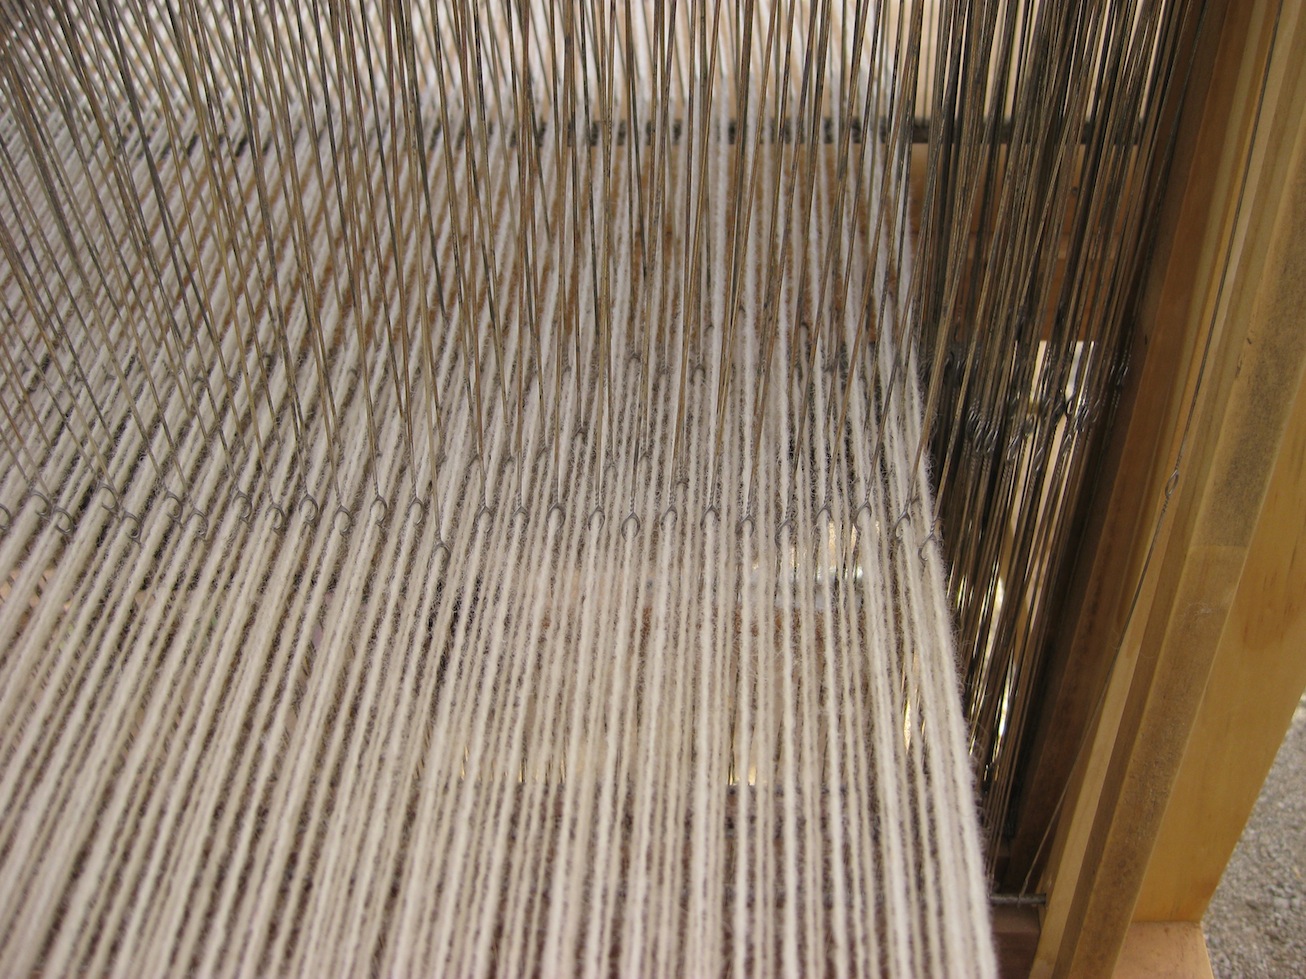
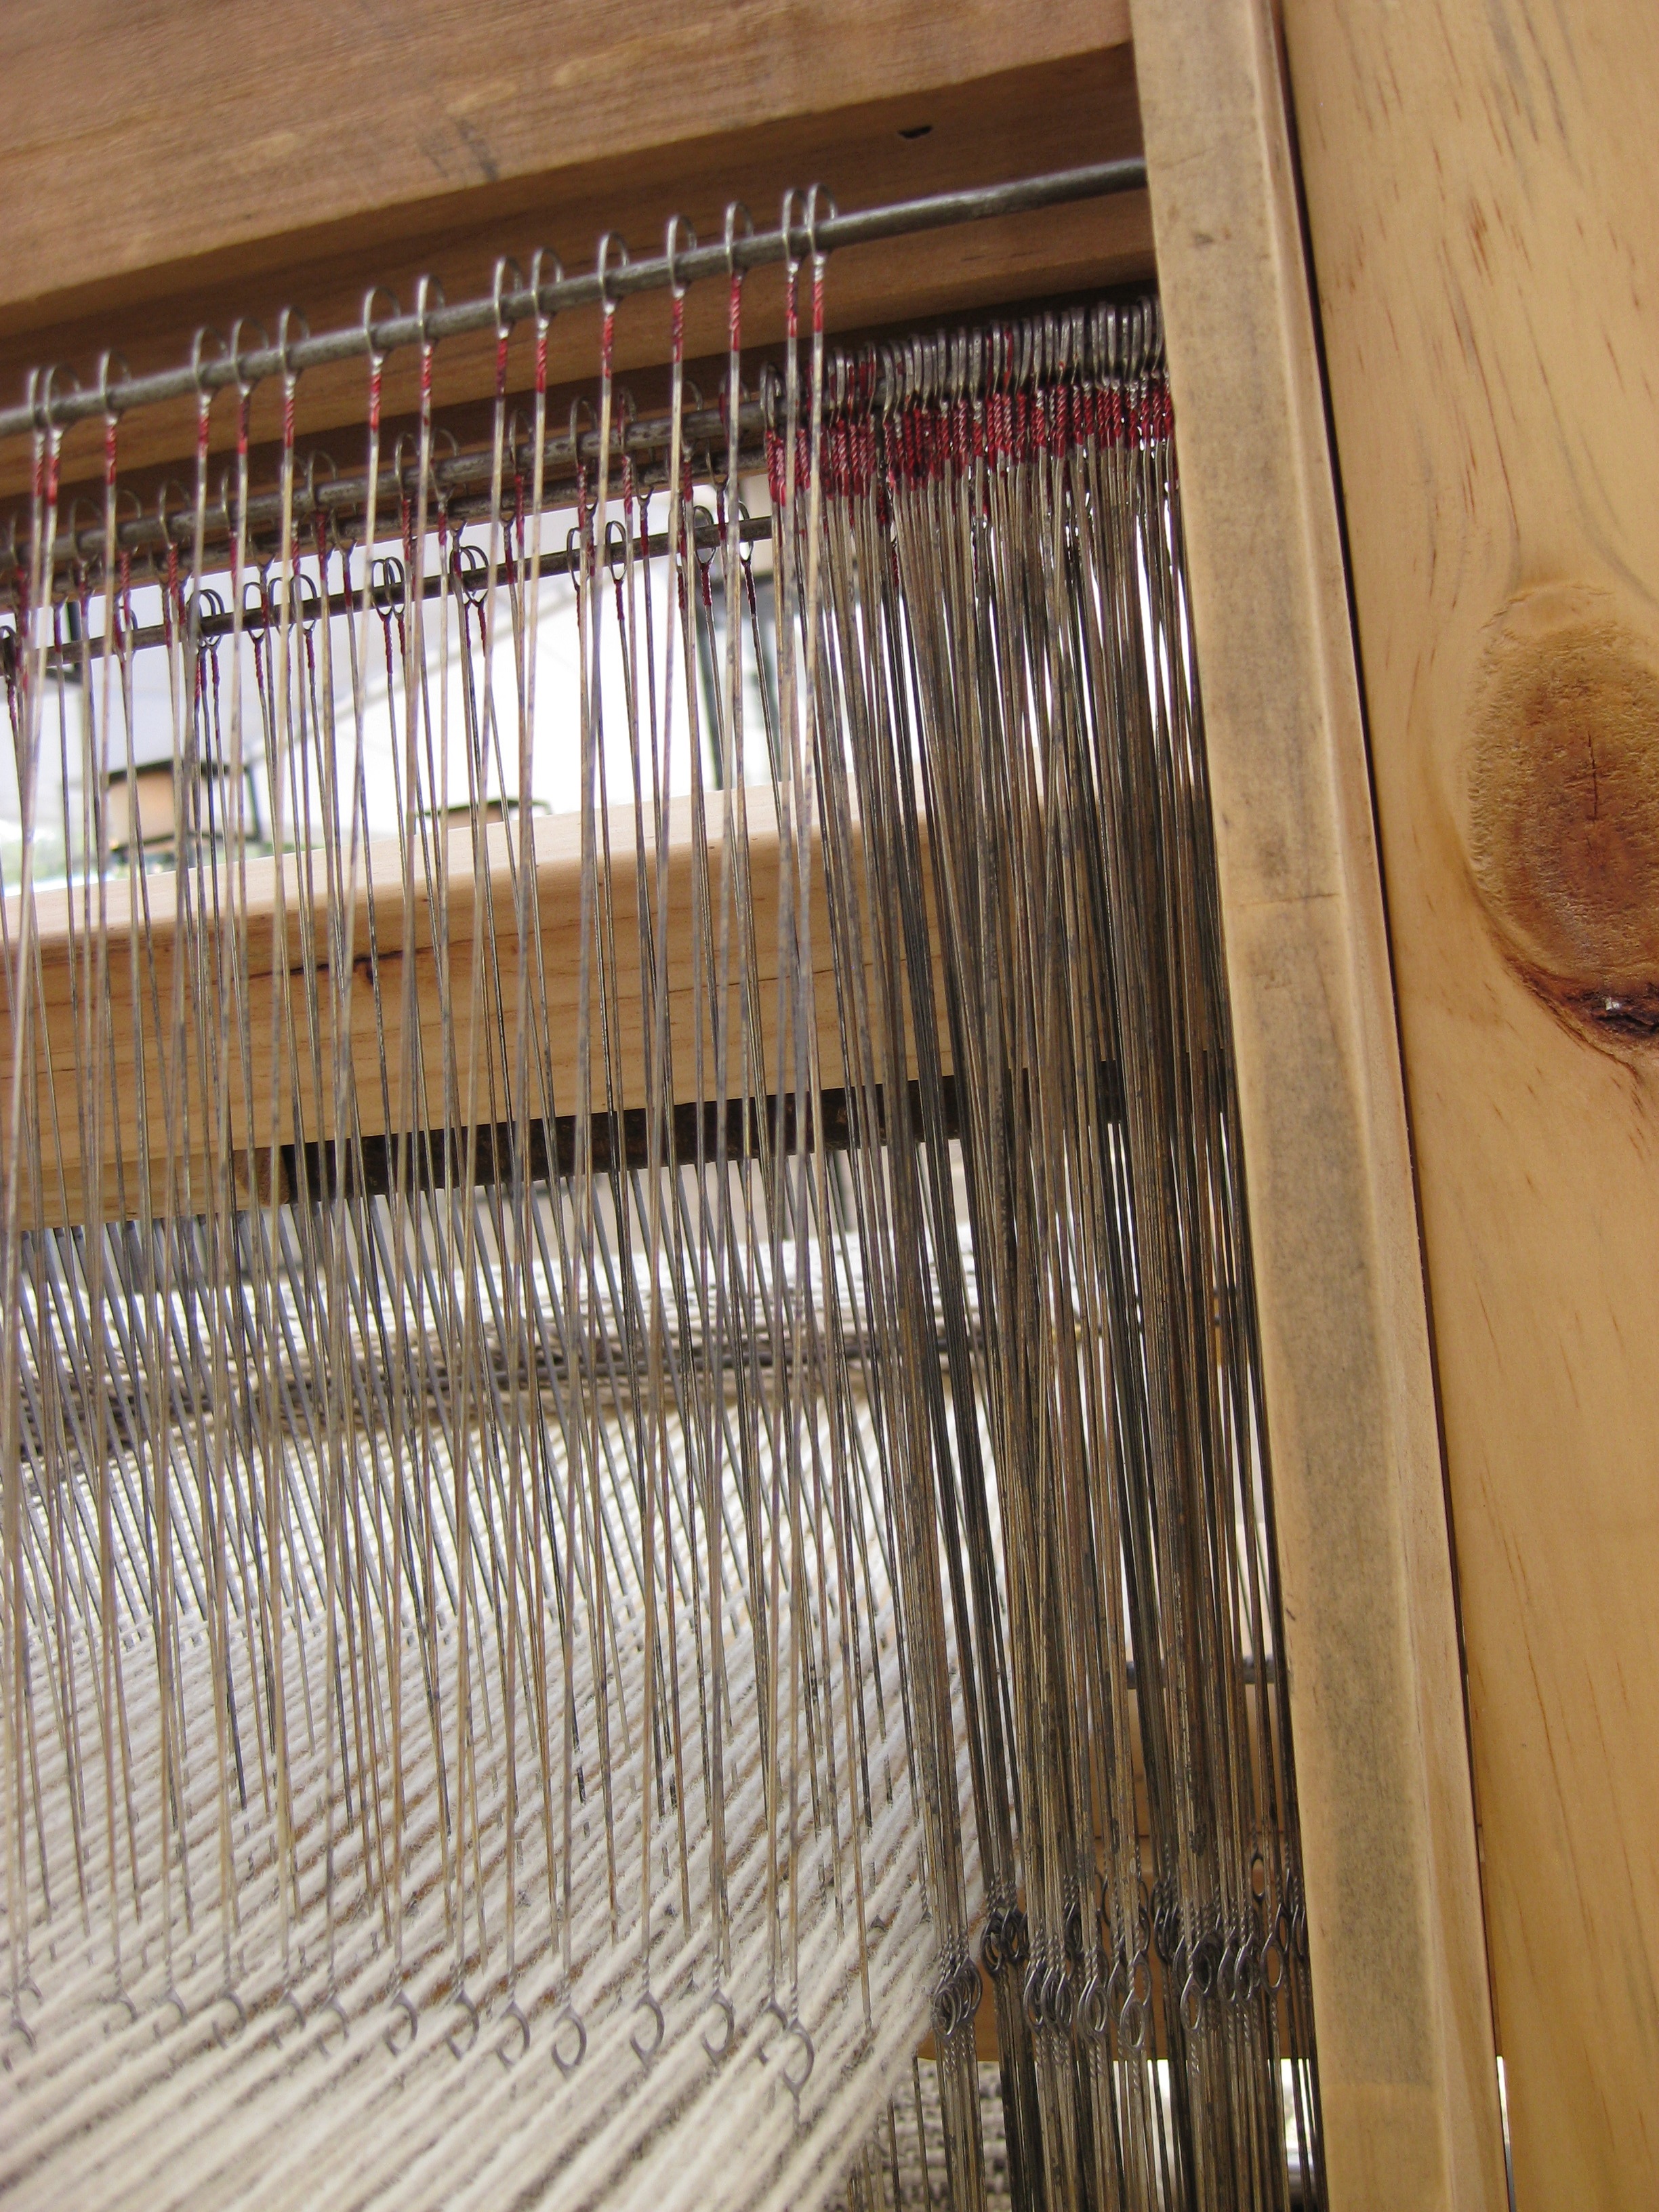
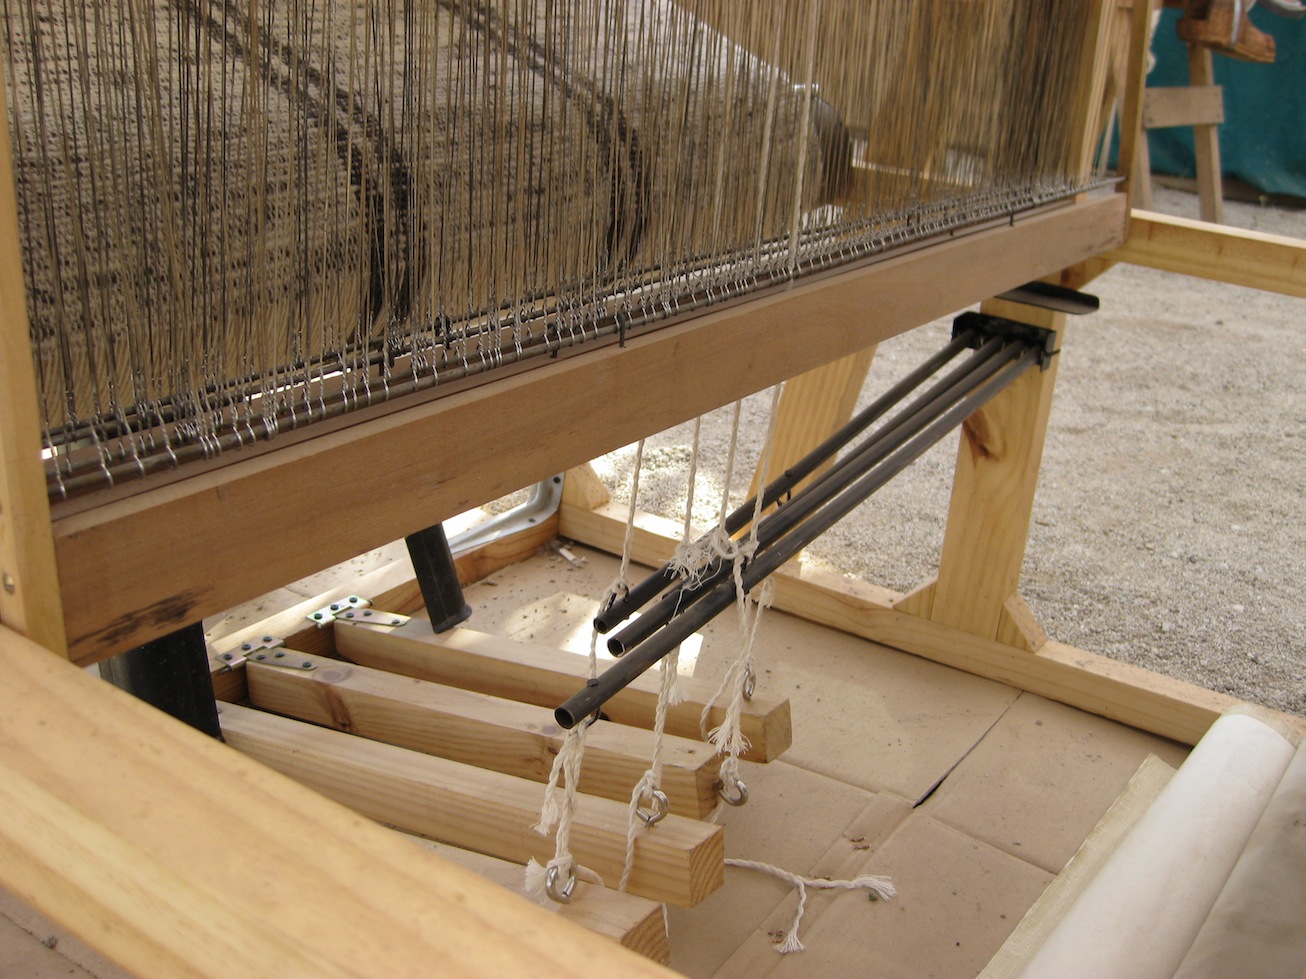
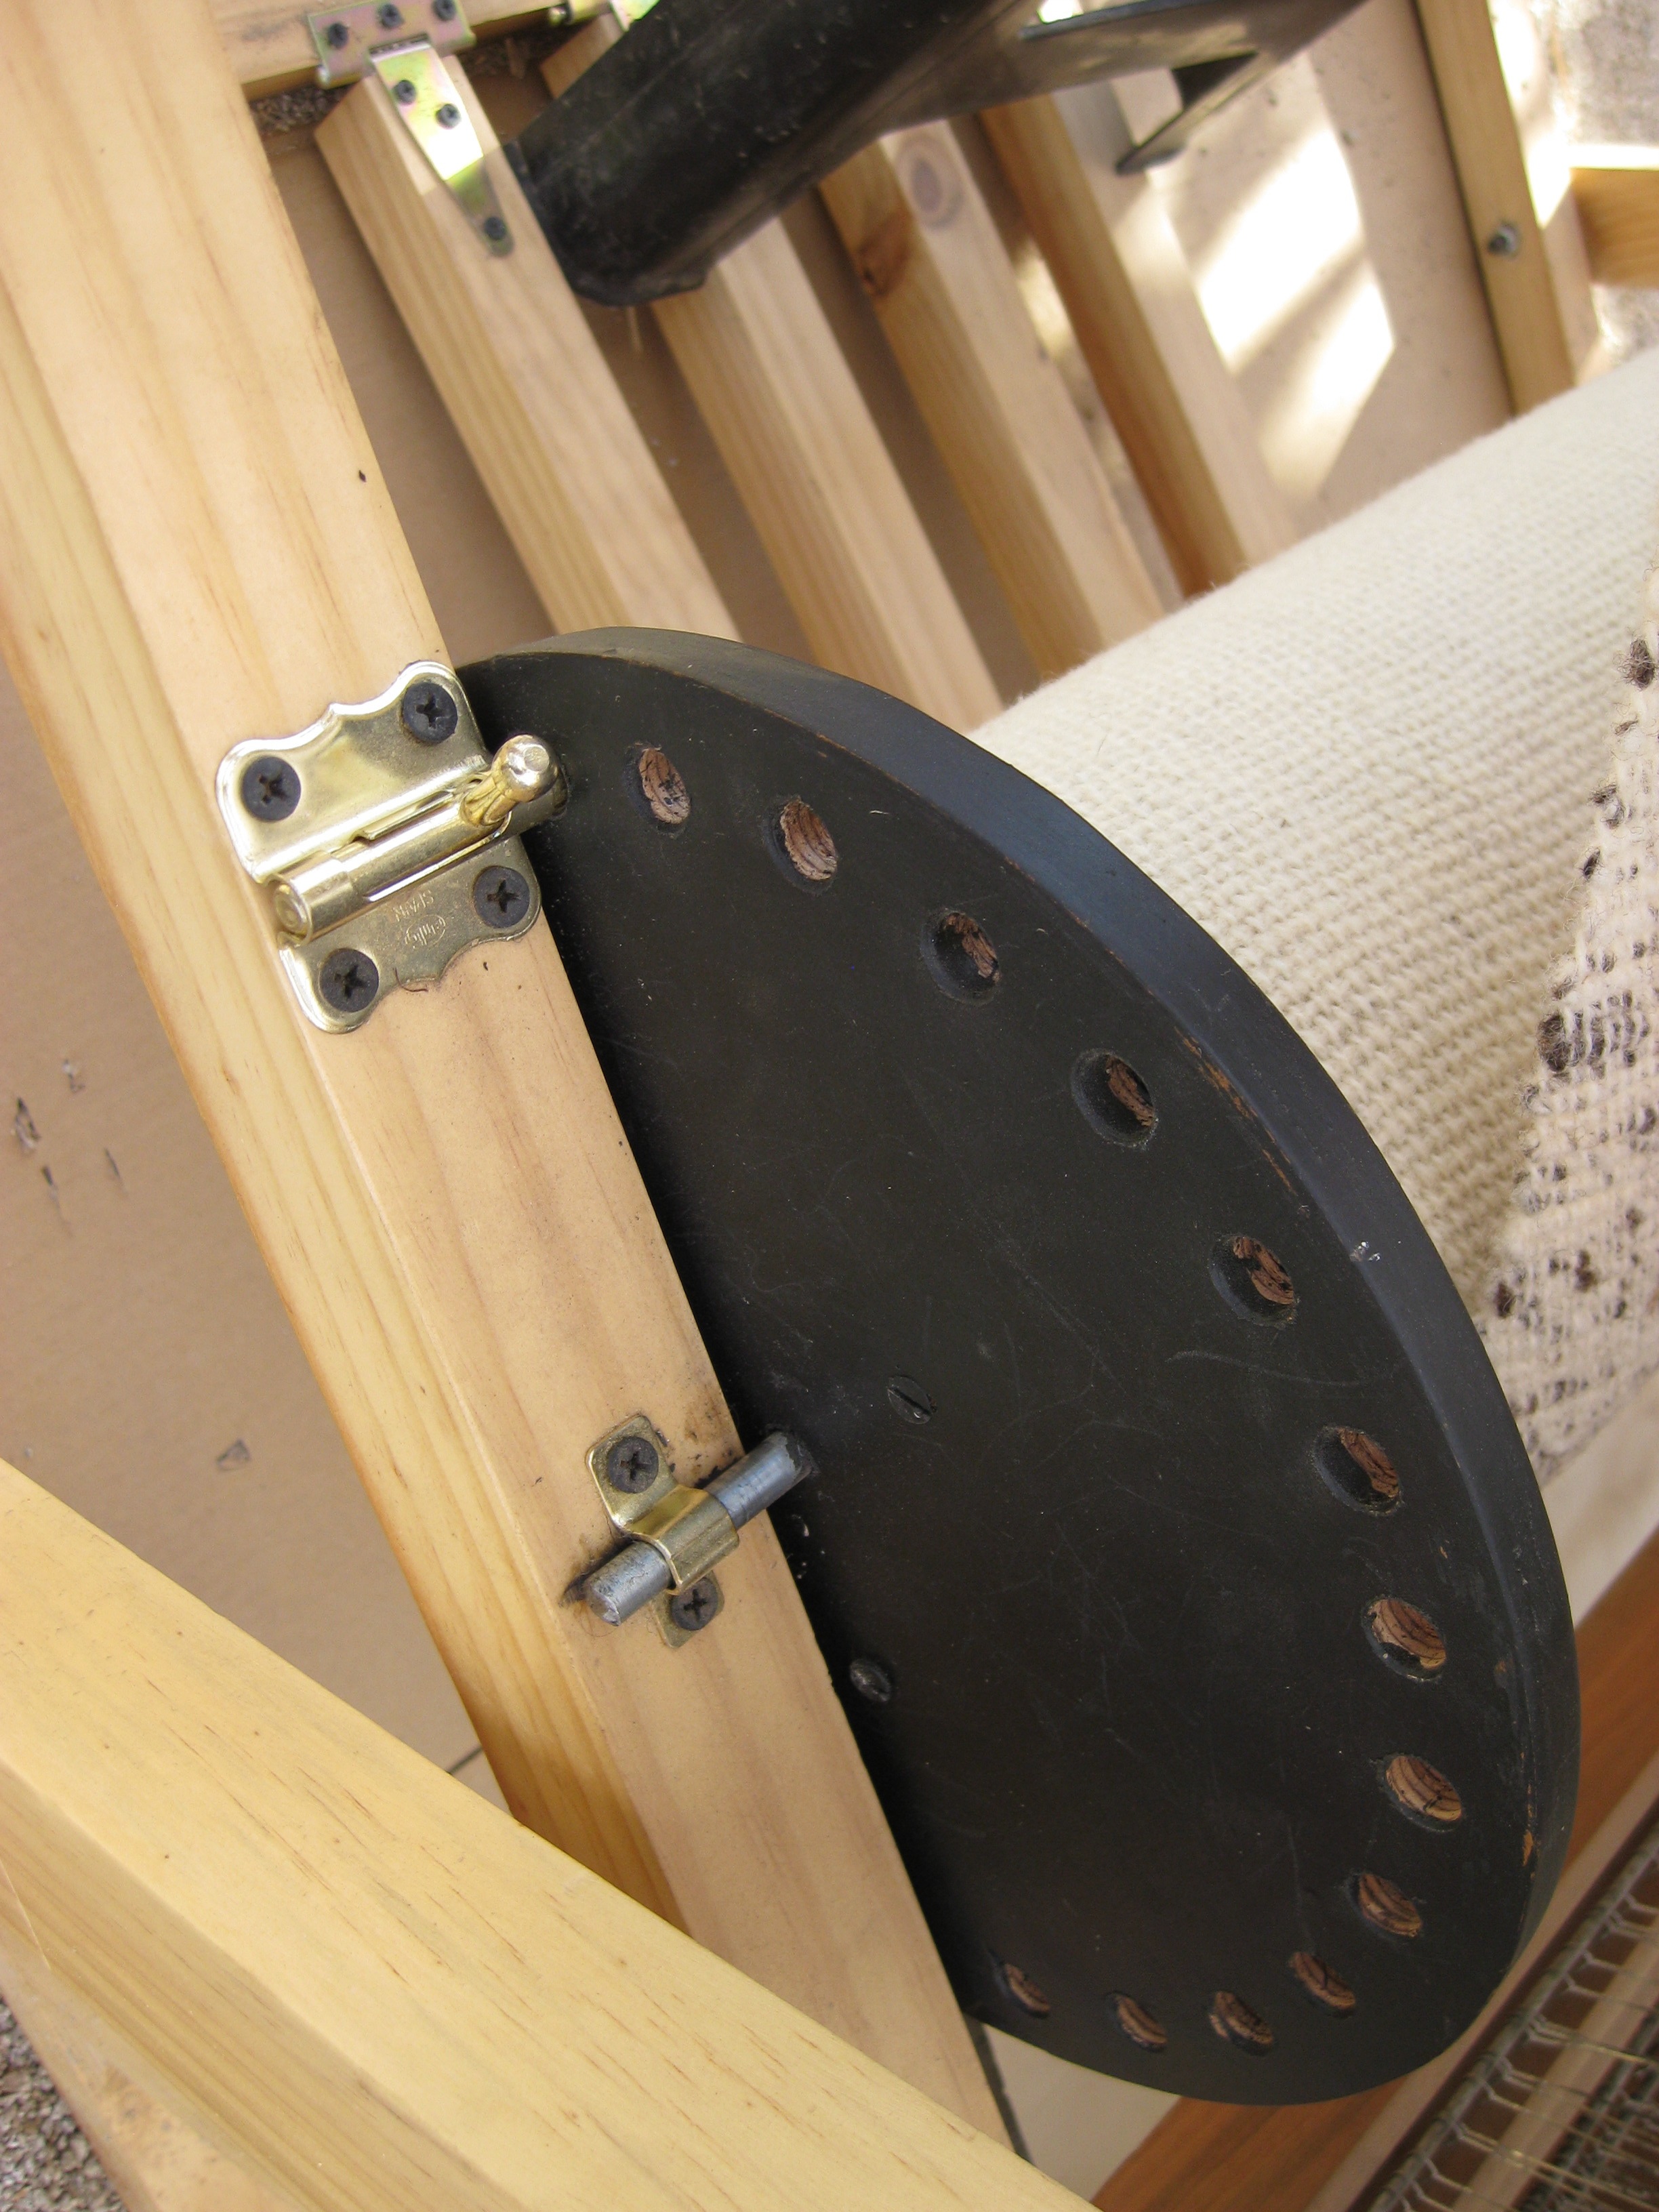
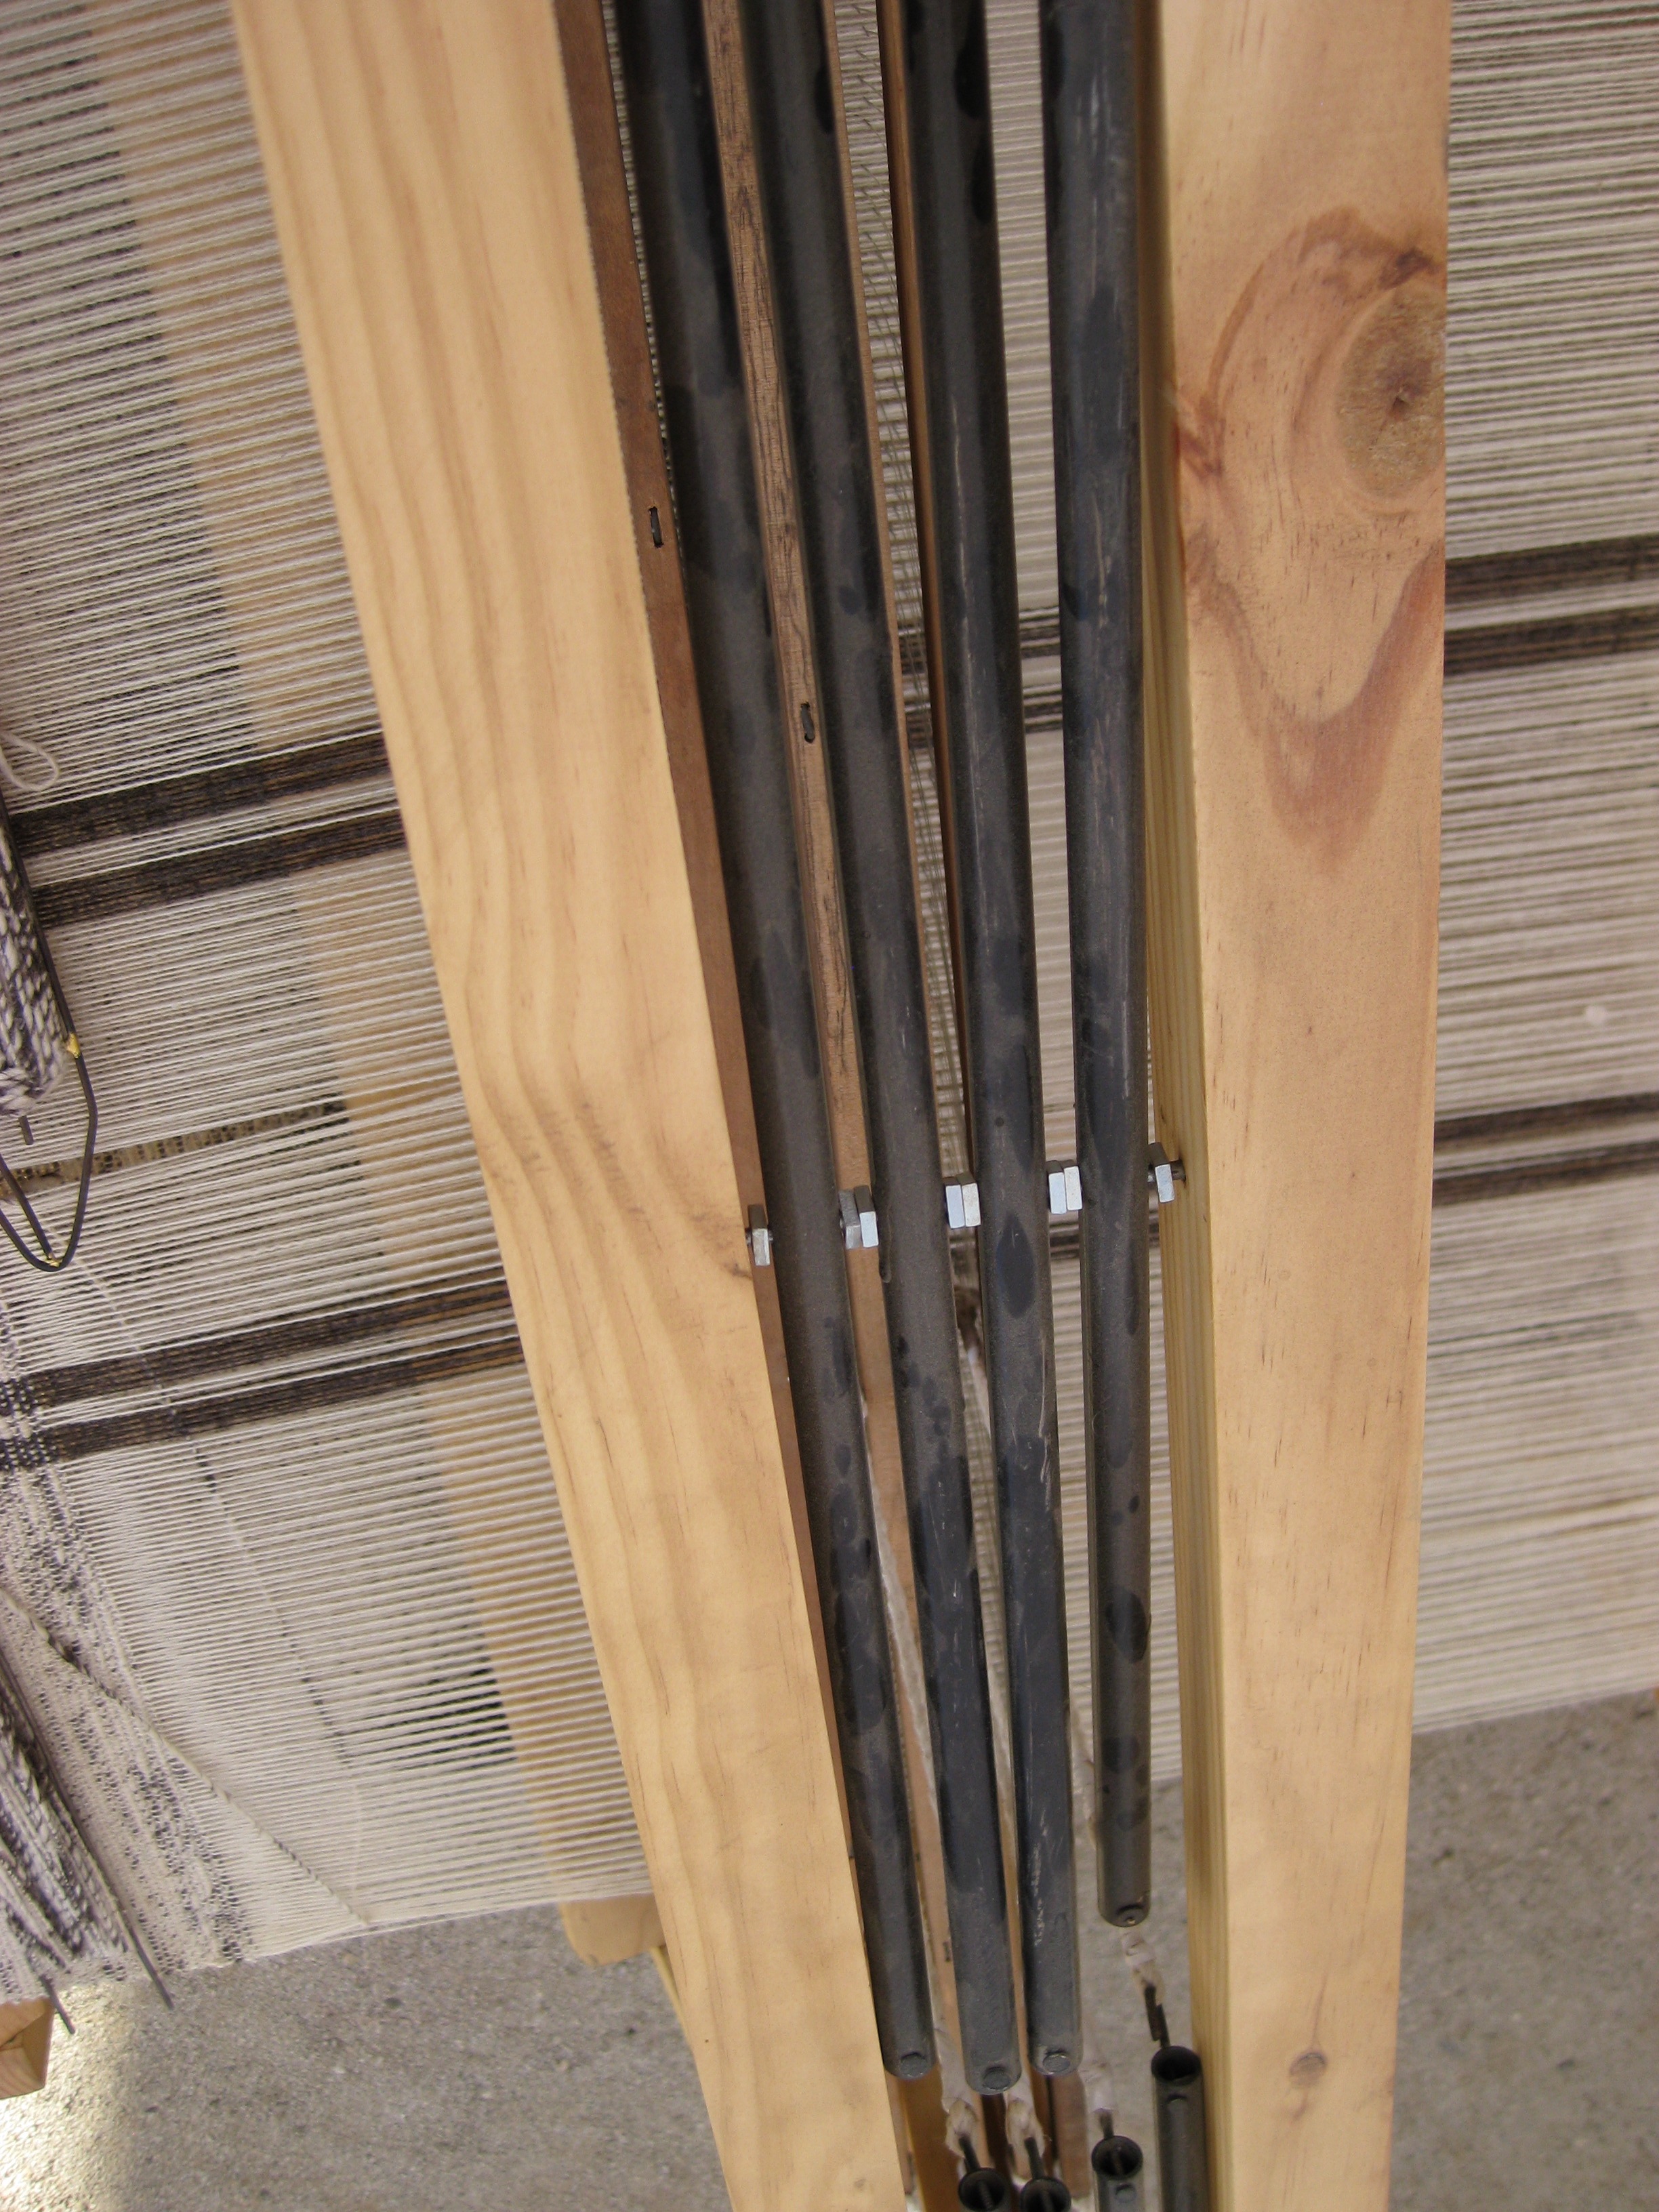
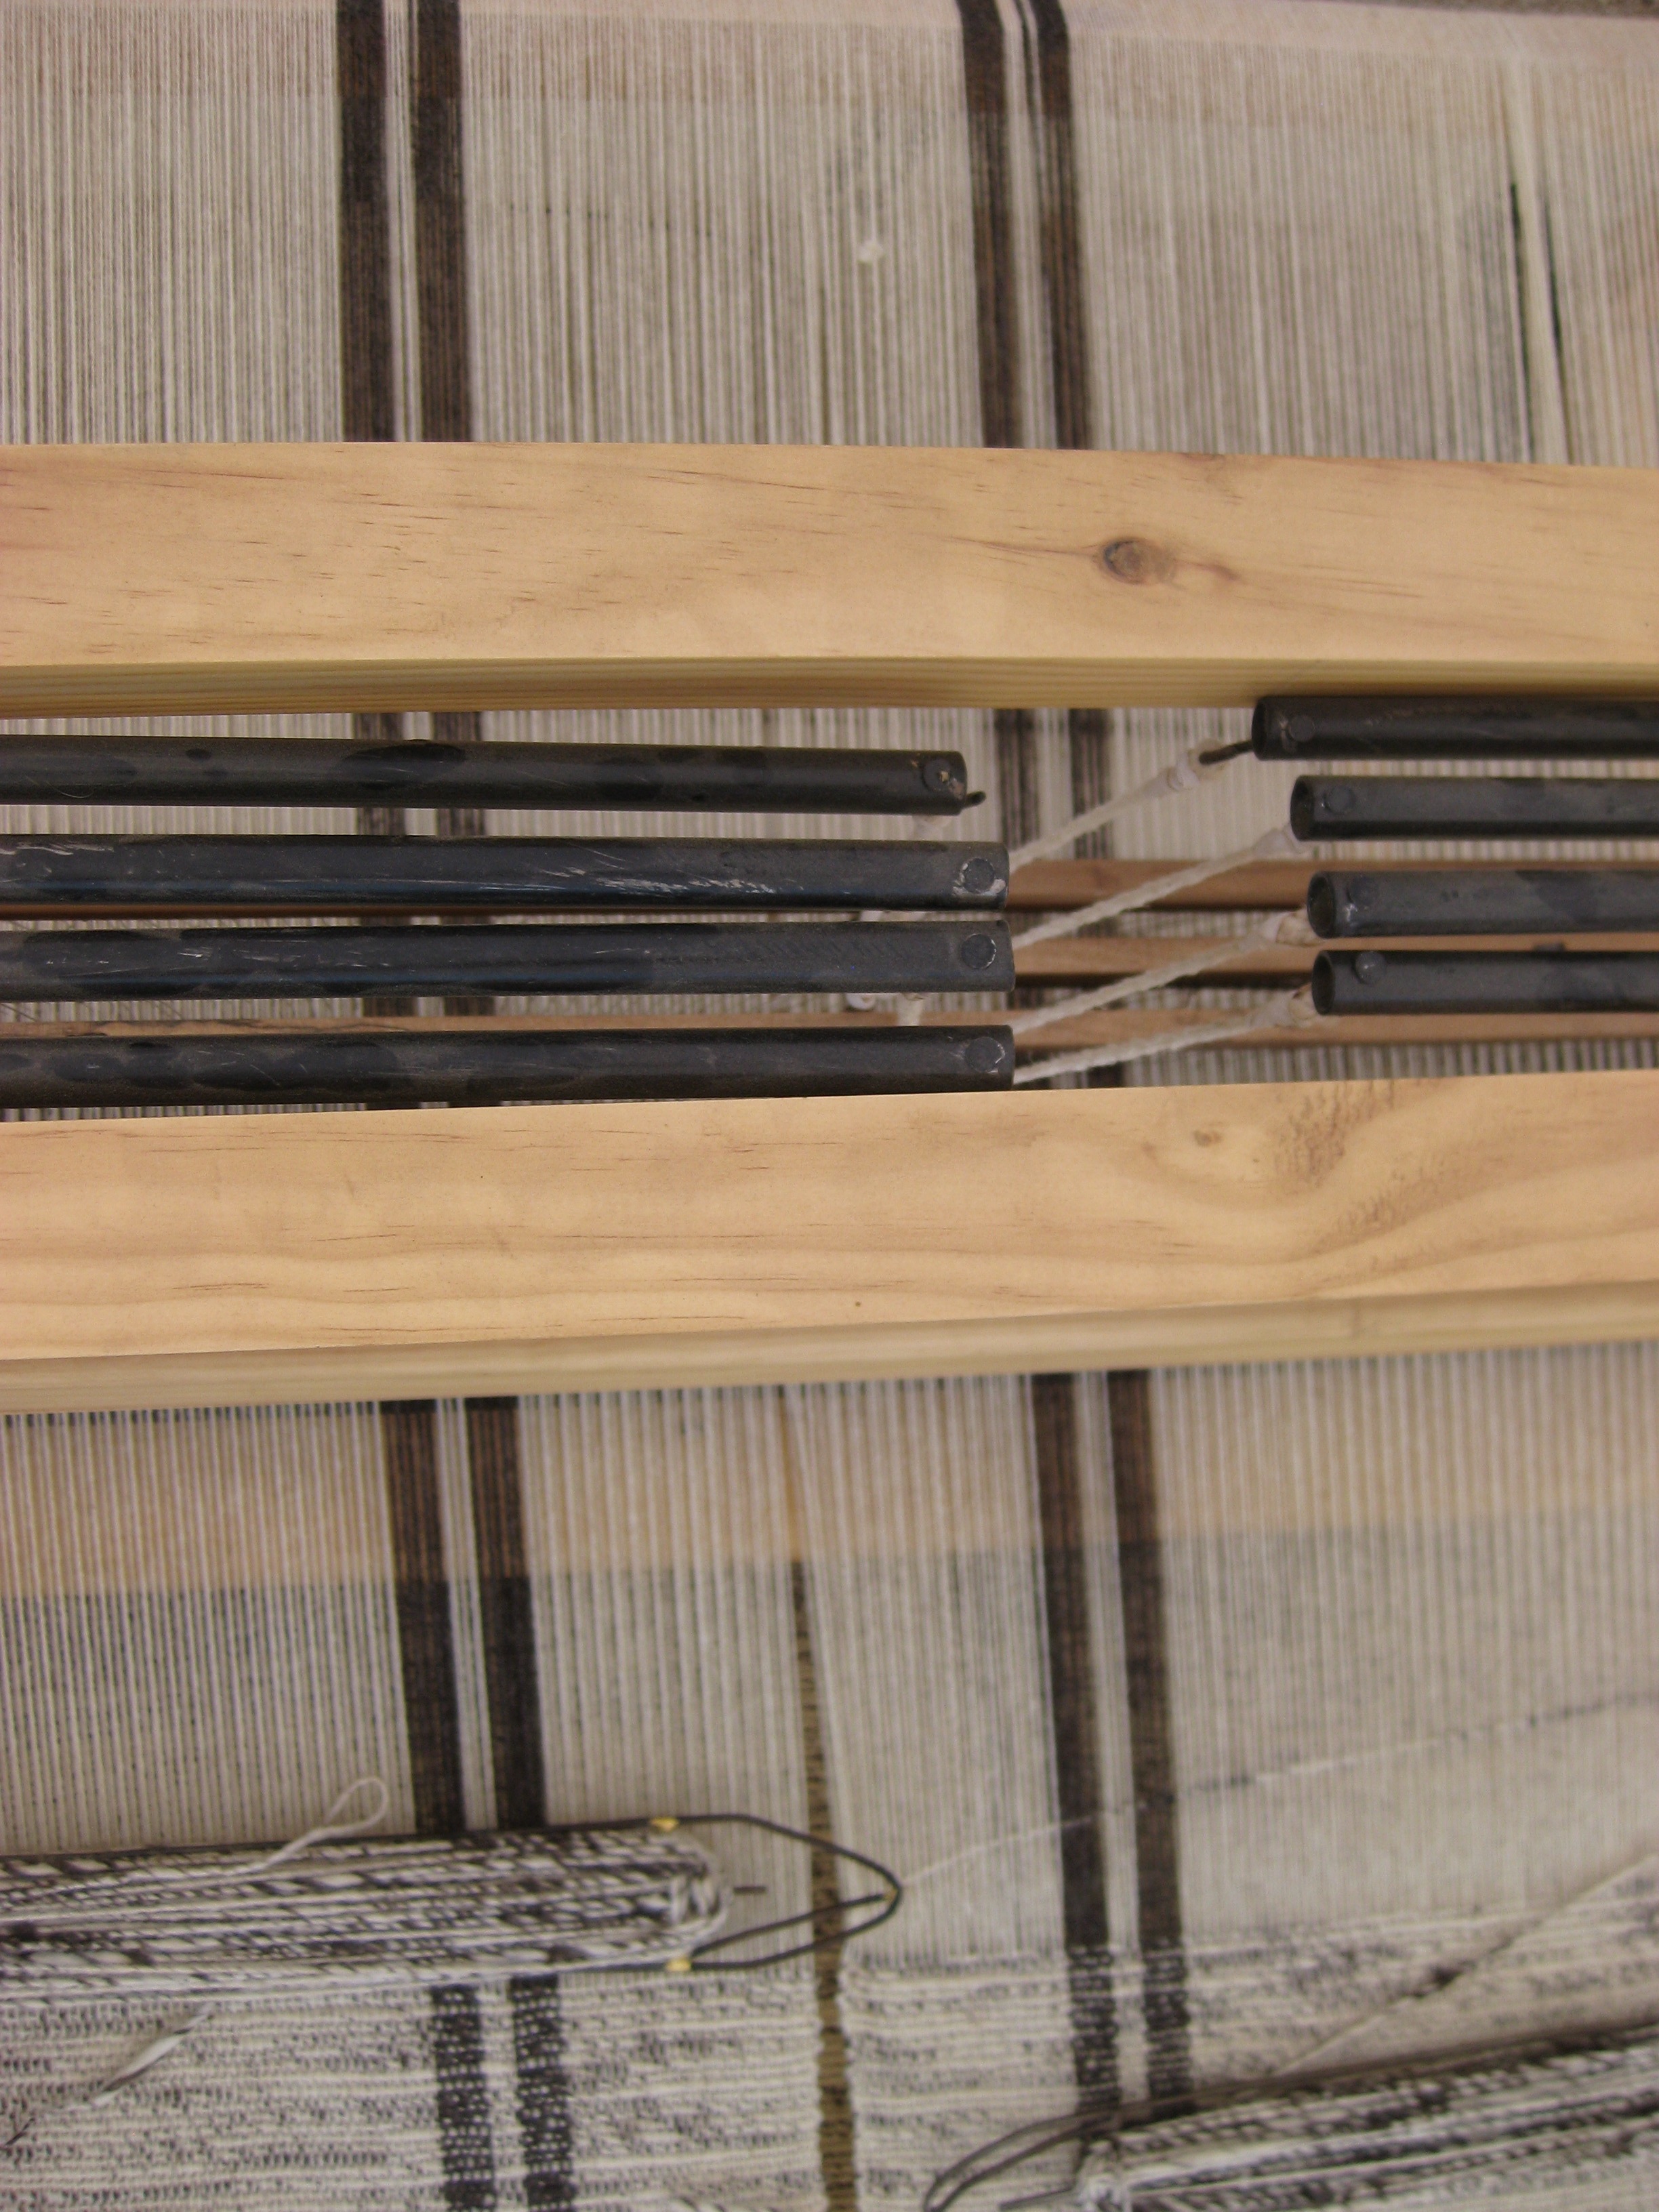
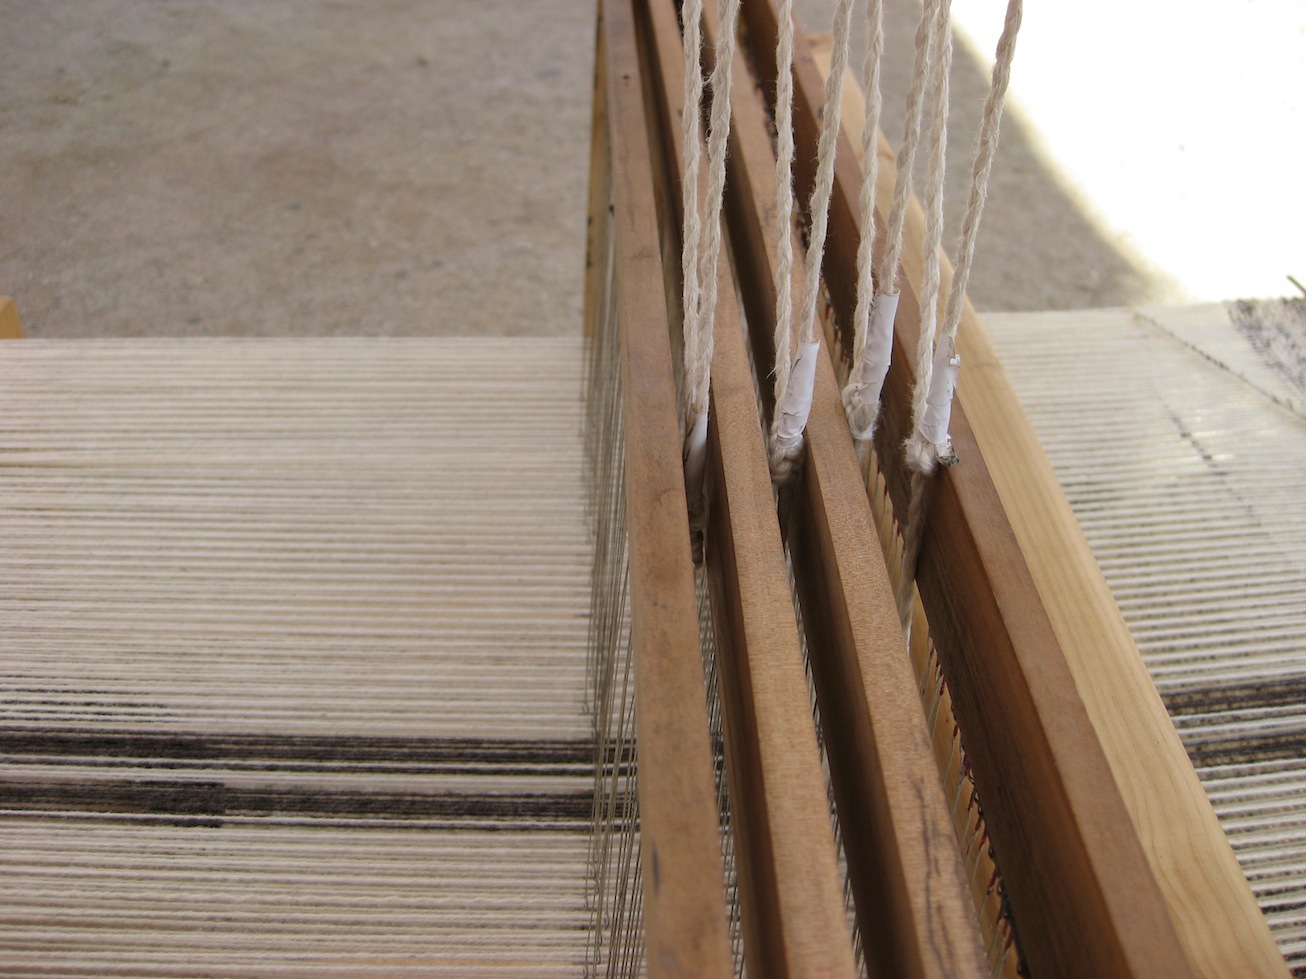
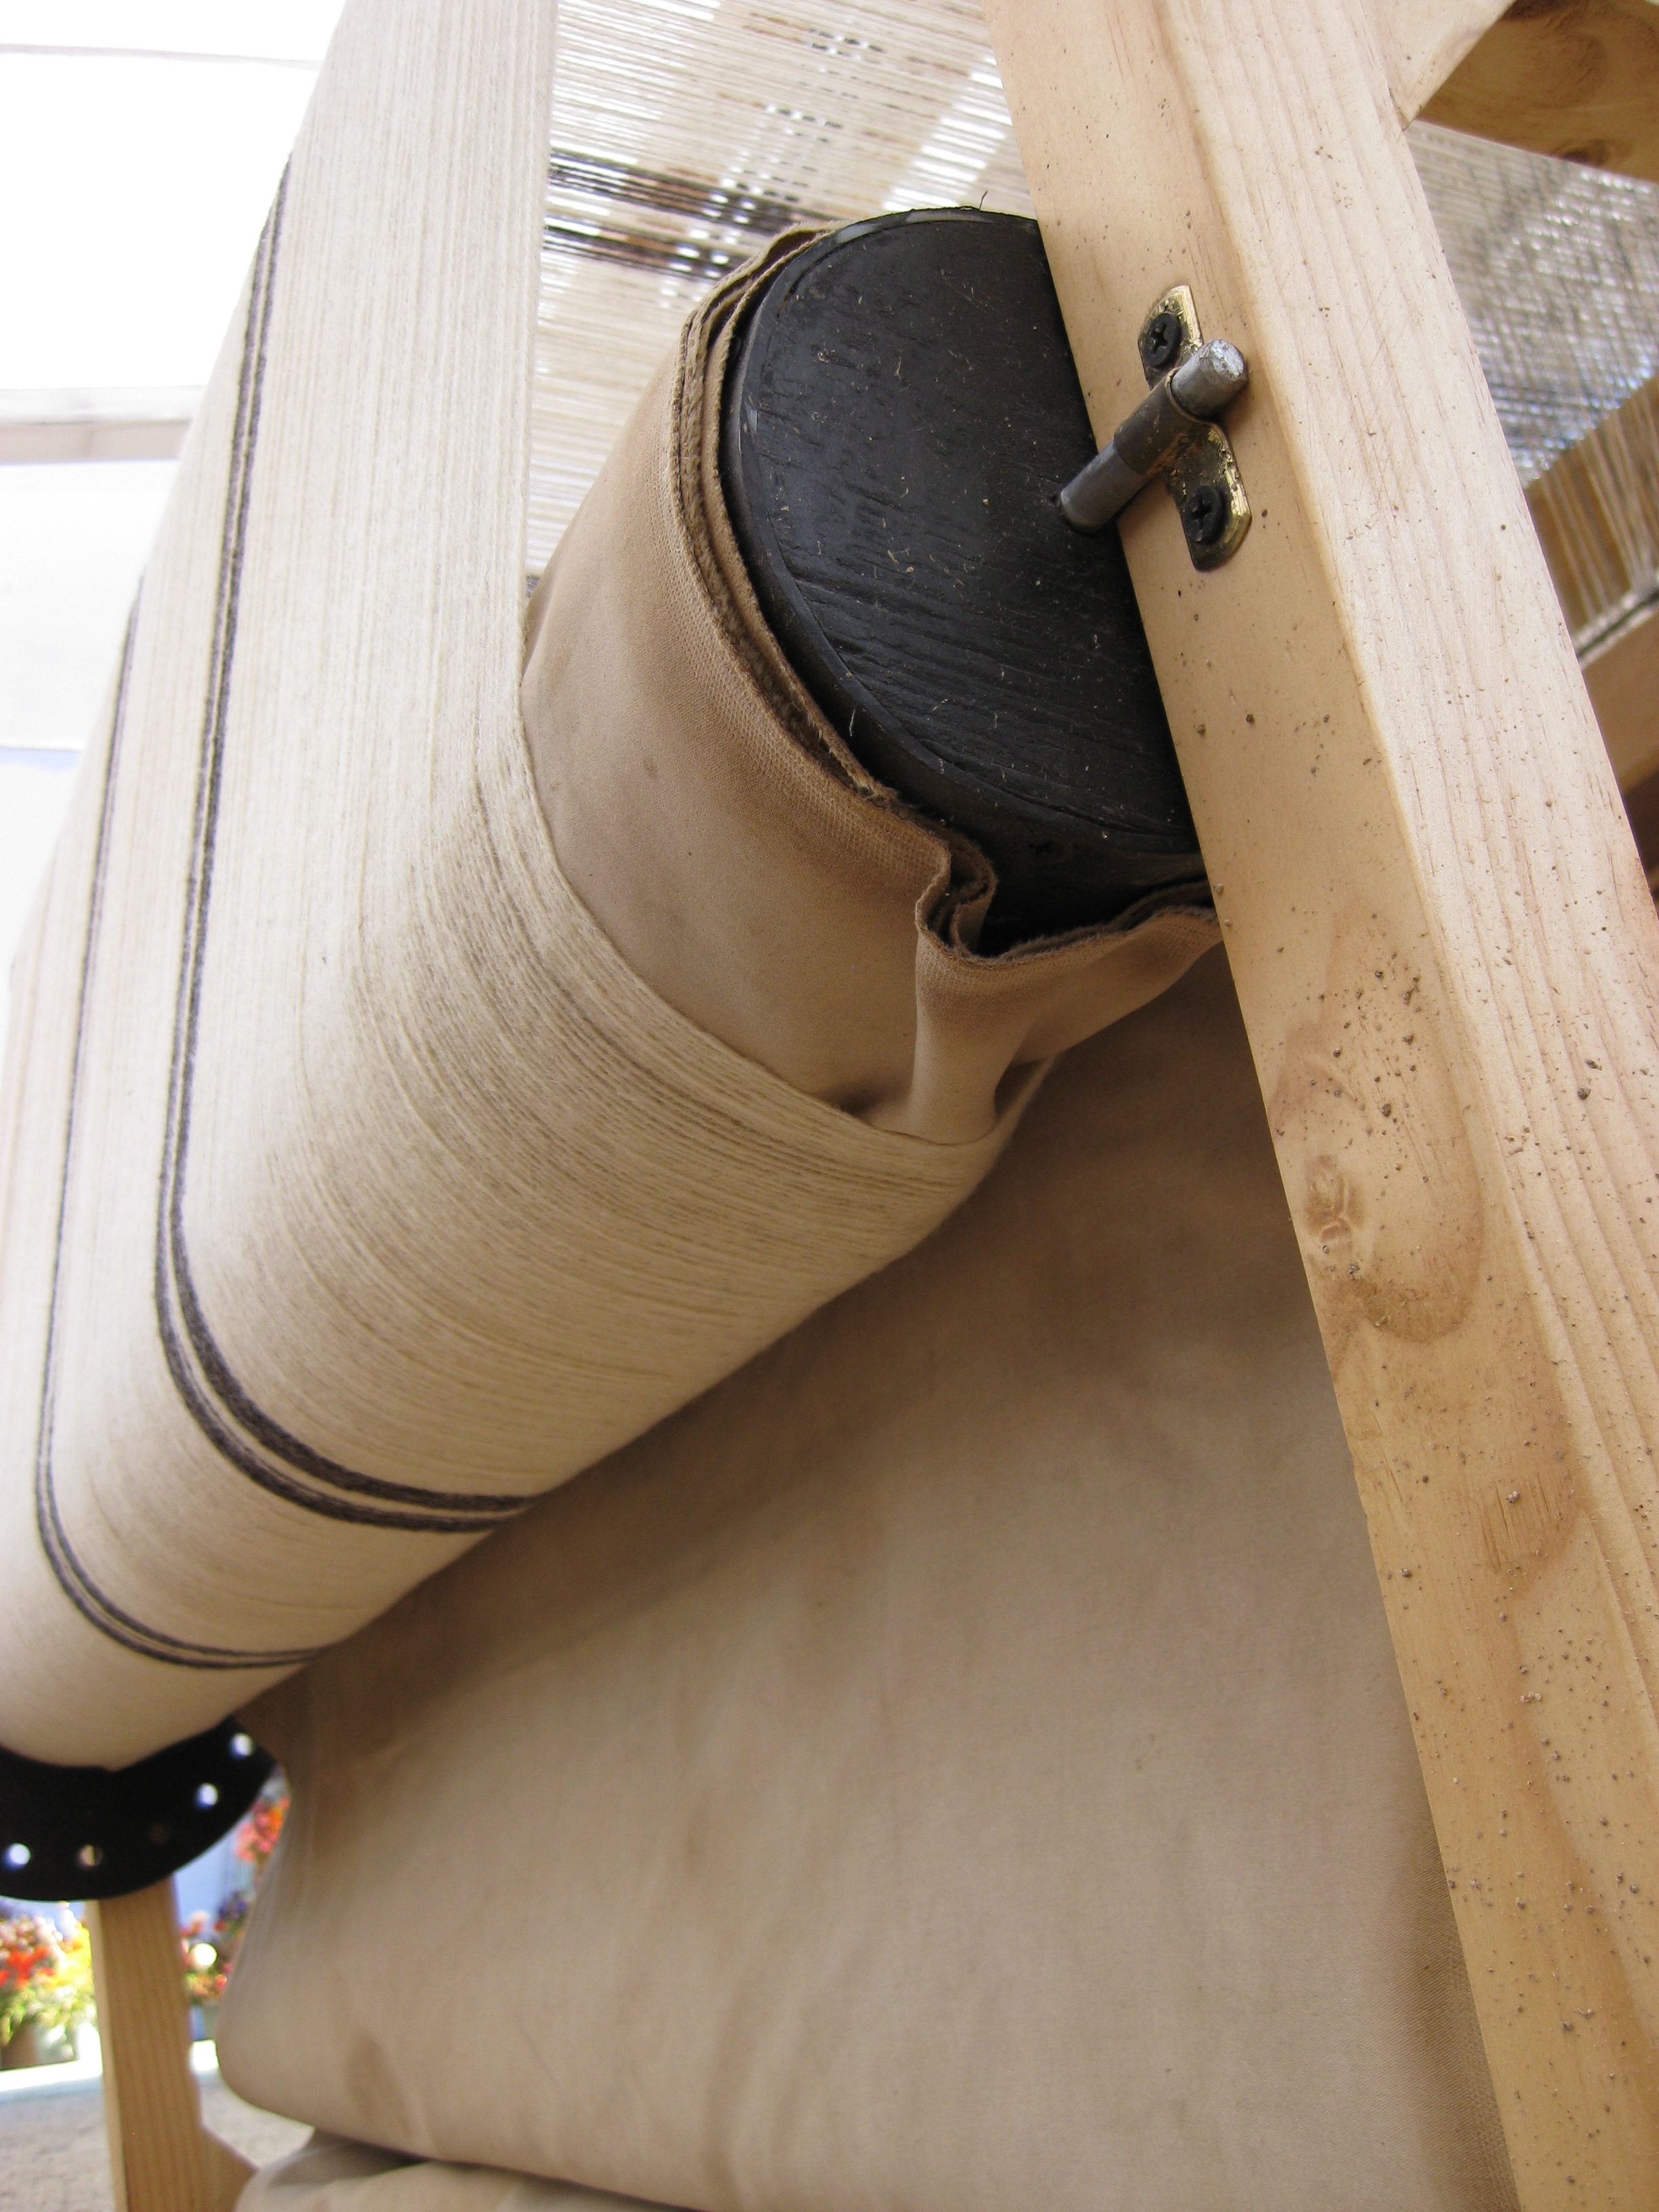
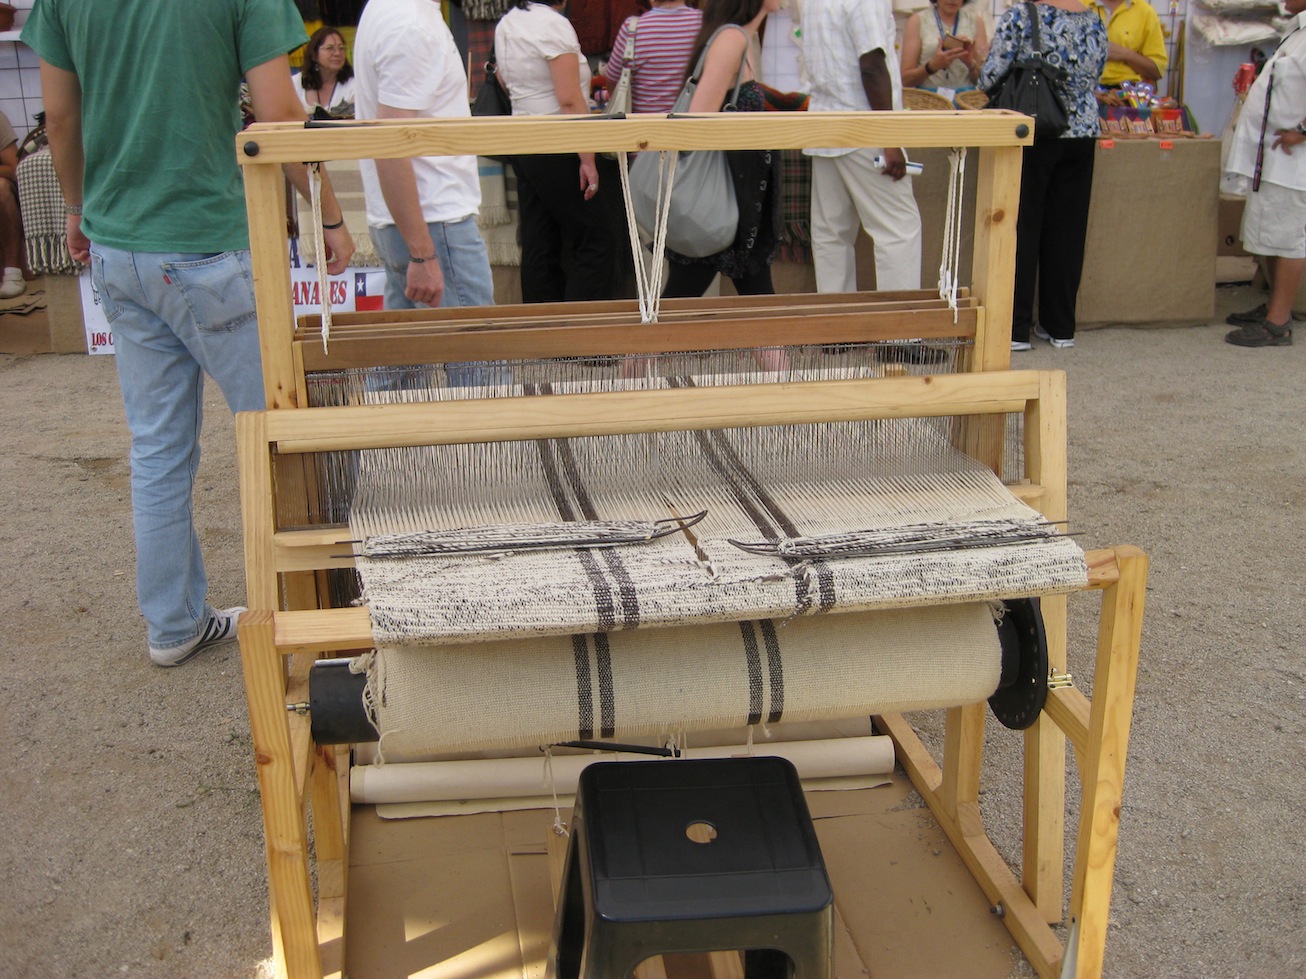
I was at a craft fair in Santiago Chile a couple of years ago where there was a foot-treadle floor loom. Fascinated, I took pictures of it from every angle. I am not about to make one, however, but the pictures might be of interest to someone else, so here they are.
Right click and select “view image” to view very large versions of these photographs.
(I hope I have the correct name for this. Please comment).