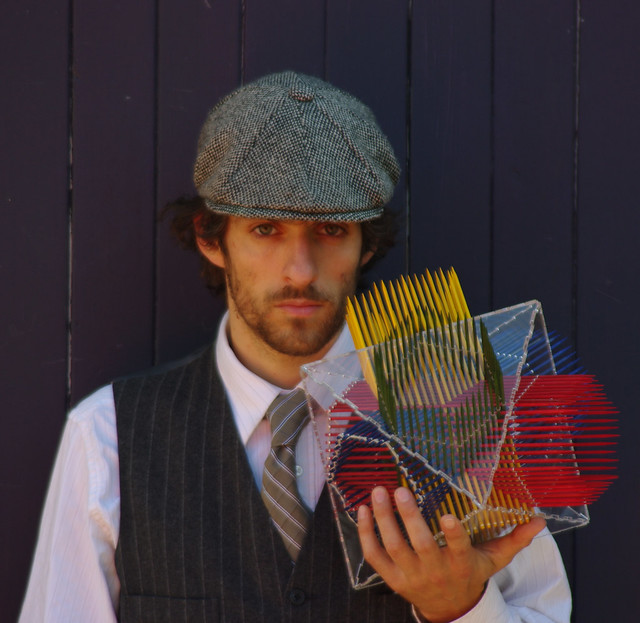
I invited some friends over to make icosahedrons in my workshop! Here are the pictures.
After eating some delicious apple butter bars, cookies, and drinking chinese tea, we headed out to the studio where I helped my friends make these awesome cool geometric shapes. The colouring of these icosahedrons is quite special, and soon I'd like to do a feature on that too!
</embed>
Do you like fog machines? Do you like fog machines that can go in your pocket?
That is what an e-cigarette is. A fog machine that produces fog when you suck on it. The "e-liquid" is actually the same, or a very similar chemical to the one found in fog machines. And they work the same way (save for the sucking). Current is delivered to a resistance heating wire that is in contact with the chemical. The chemical then vapourizes and makes the fog.
I have converted the e-cig cartridge so that it draws power from a wall wart power adaptor, and is activated by a button. With a good battery, you could have one of these in your coat pocket!
Here is some info on it:
Basic pushbutton switch circuit.
Greensmoke E-cig cartridge refilled with vegetable glycerin. Inside it, a wire gets red hot, and vapourizes the glycerin.
Solder wires on instead of battery.
Don't hack adaptors that you use for other things. You are very likely to break burn them out or otherwise destroy them. Read the output in volts and in mA. A smoke machine uses heat, which means high amperage. These adaptors are less common.
Adaptor output MUST deliver at least 2 Amps and at most 4.5 volts. If not, this is like short circuiting it and could destroy it.
Do not use a switch that stays on - you could cause a fire.
Here is the video:
Here is a picture:

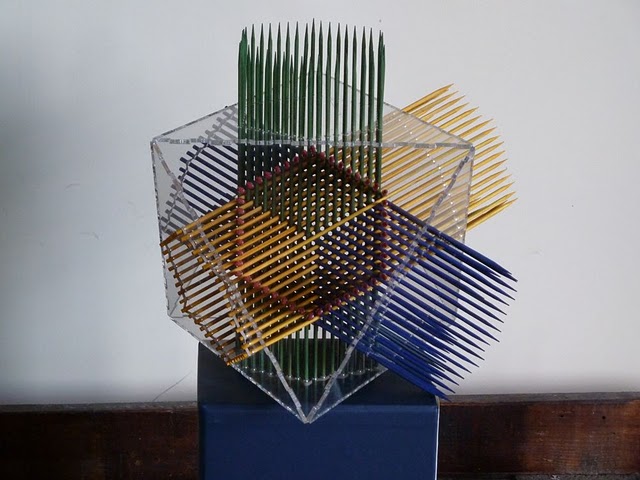
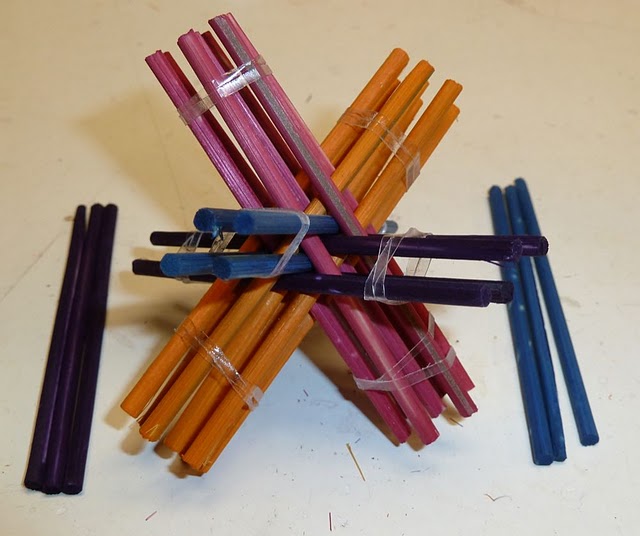
How to make a Hexastix, like George Hart’s “72 pencils”.
Shoutout to Matt Parker’s standupmaths fans!##
Say hi in the comments if you came here from Matt’s video!
About Hexastix:
If you haven’t seen George Hart’s sculptures before, you need to go check him out: http://www.georgehart.com/sculpture/pencils.html . And while you are at it, go see his daughter’s site too, vihart.com . Hexastix, and this method of construction, were introduced to me by Matt DeVos, a mathematician at Simon Fraser University. The word hexastix refers to infinitely regular hexagonal prisms - hexagonal sticks. The idea is that if you filled every hole in this configuration, and expanded your Hexastix forever, the result fills 75% of space (I think), and has some crazy symmetry group described in “The Symmetry of Things”, by Conway, Burgiel, and Goodman-Strauss.
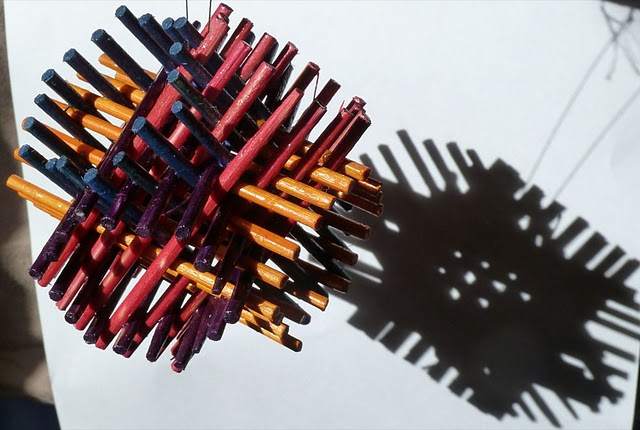
They are challenging at first, but easy once you get the hang of it. Hexastix make great ornaments and gifts! Here are a few that I have made:
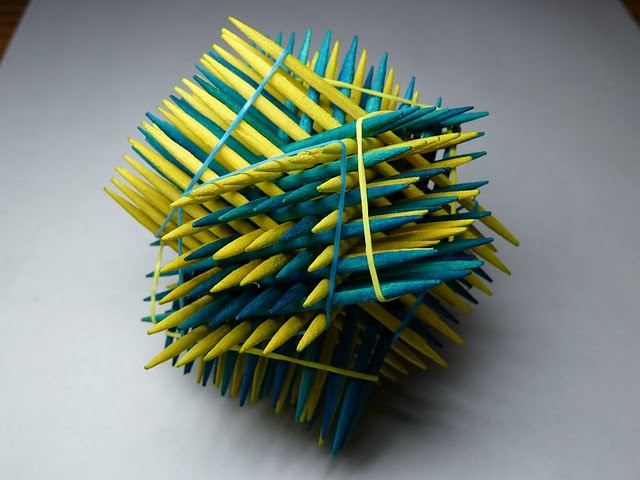
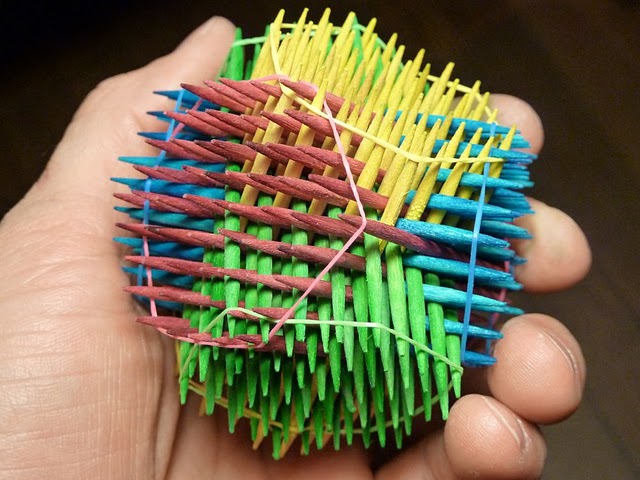
And here are the rest of them…

Hexastix arrangement all by Alejandro Erickson, on Flickr
Your sticks and elastics might differ a little from mine. This video will also help:
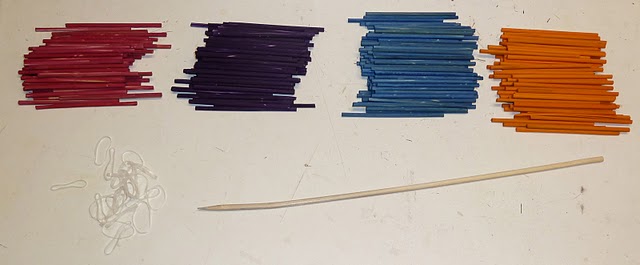
Materials :
- A supply of sticks in 4 colours. This hexastix uses 18 sticks of each colour, but you need a few extras for breakage and stuff.
- 8 small elastics.
- A poker thingy, like a pointed skewer.
- (optional, not shown) white glue, water, ziplock bag, human powered centrifuge.
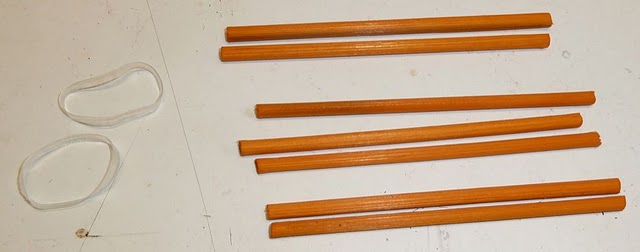
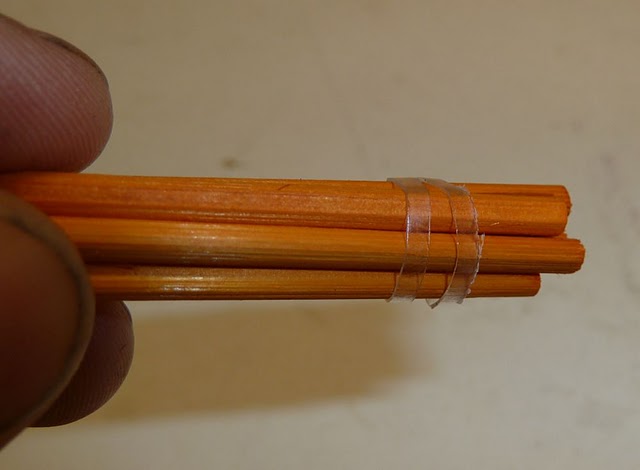
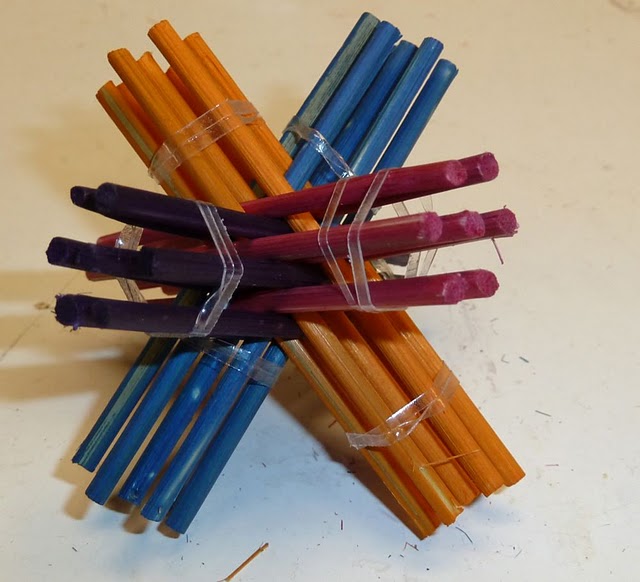
Fasten 7 orange sticks together with an elastic at each end. I double my elastics so they stay on, but aren’t tight.
Now add four blue sticks
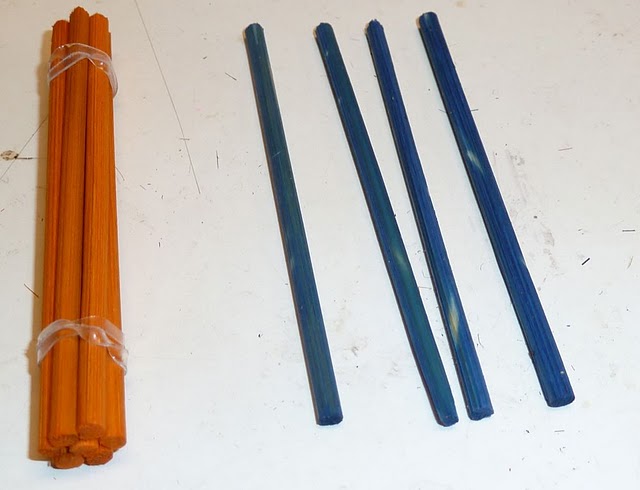
The blue sticks go between the orange ones, separating orange into sets of 2, 3, 2. Fasten the blue sticks together with doubled elastics at each end.


Add four purple sticks
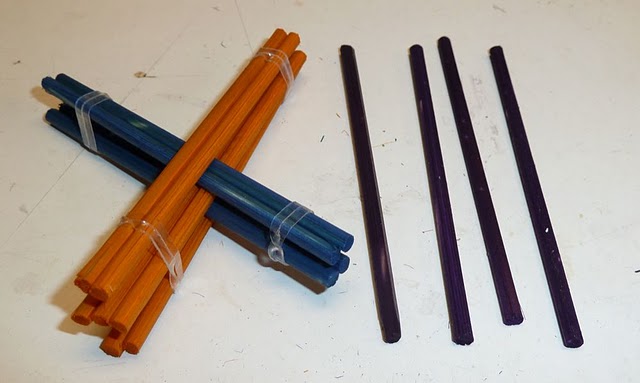
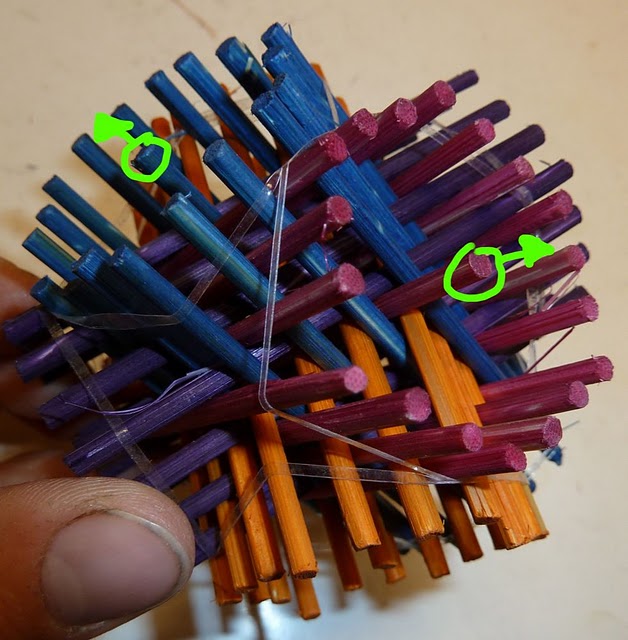
The blue sticks separated the orange ones into a 2,3,2 configuration. The purple sticks will do that too, but in a different direction. The old 2,3,2 separation is shown with blue lines, and the new 2,3,2 separation (by purple) is shown with black lines.
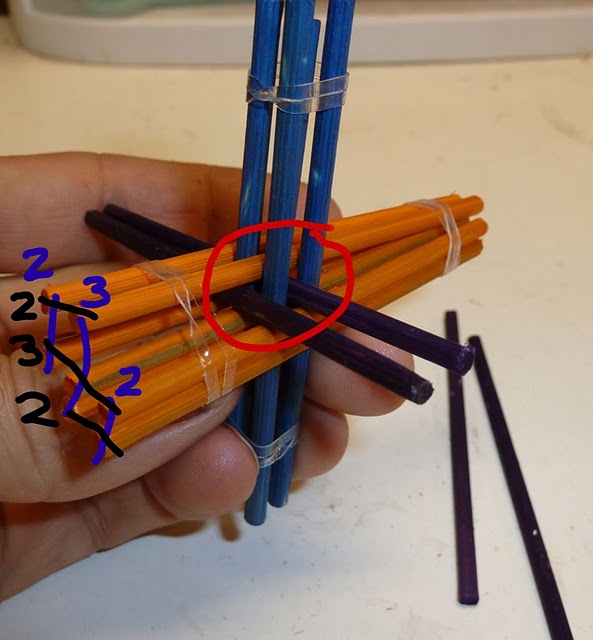
The purple sticks also go between the blue sticks, separating them into 2,2.

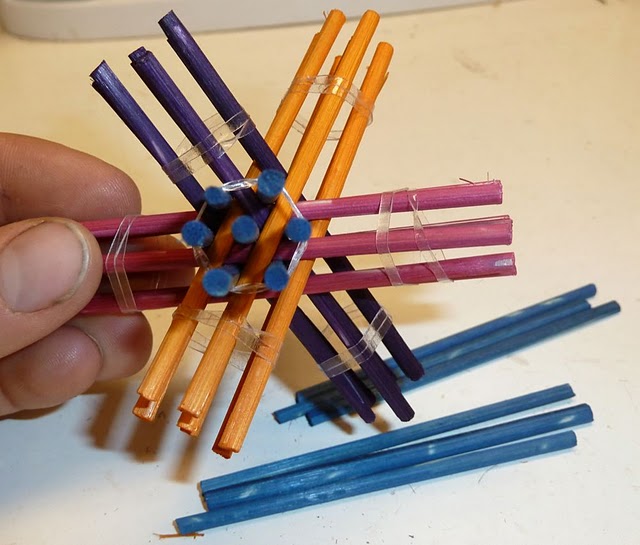
Here it is again from the ends of orange, and the ends of blue.
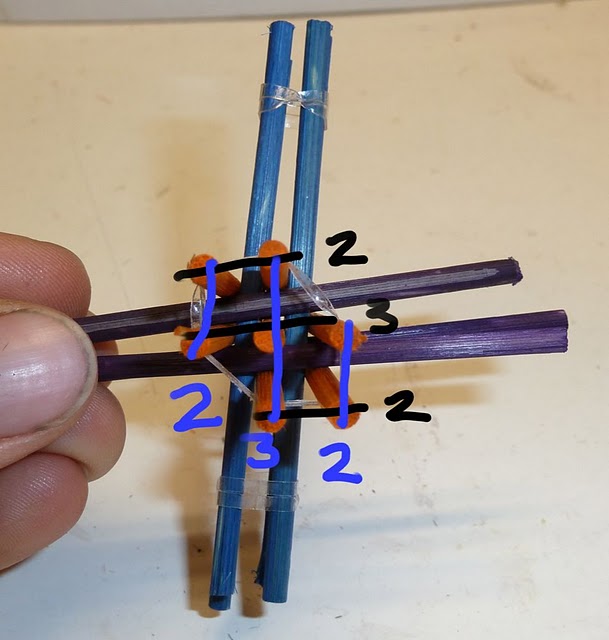
Put an elastic around each end of purple.
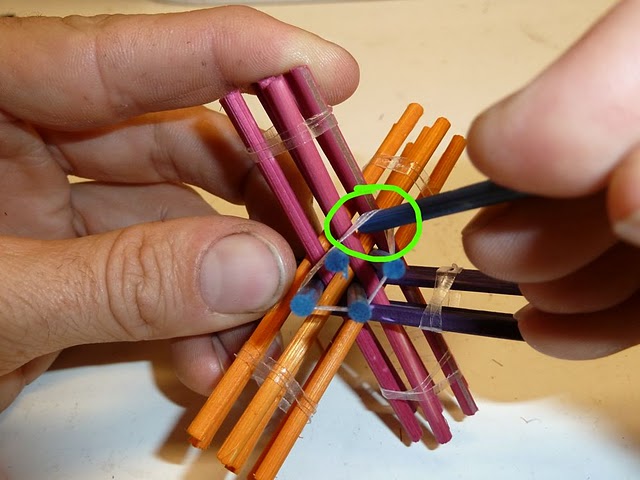
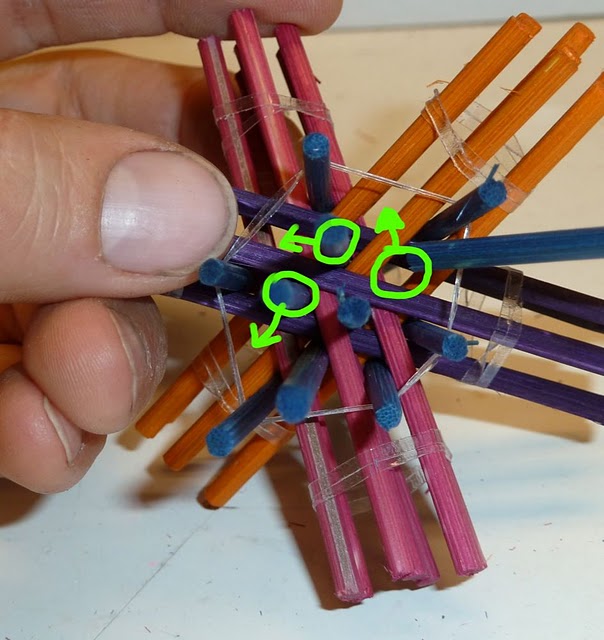
This is the key step.
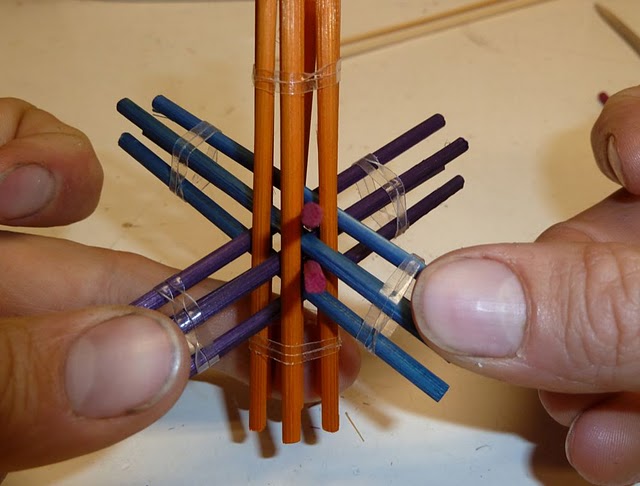
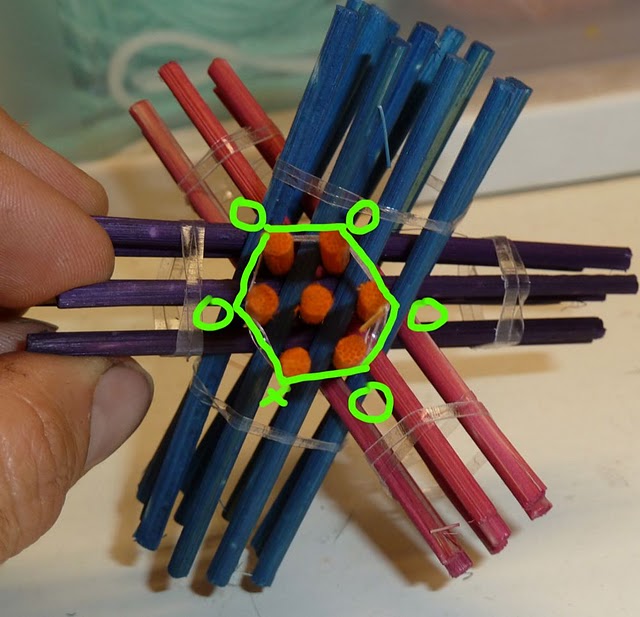
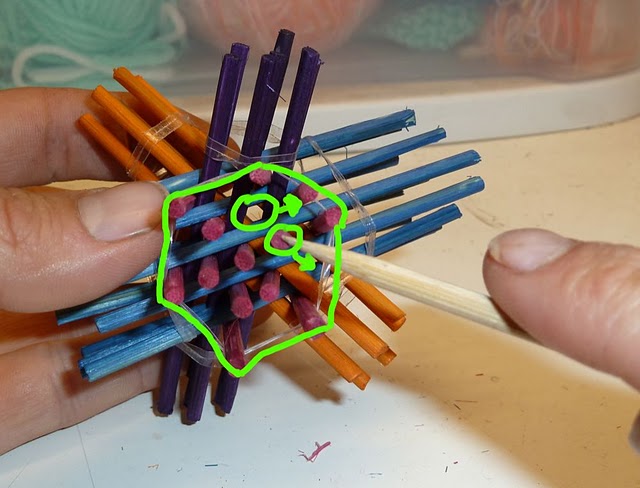
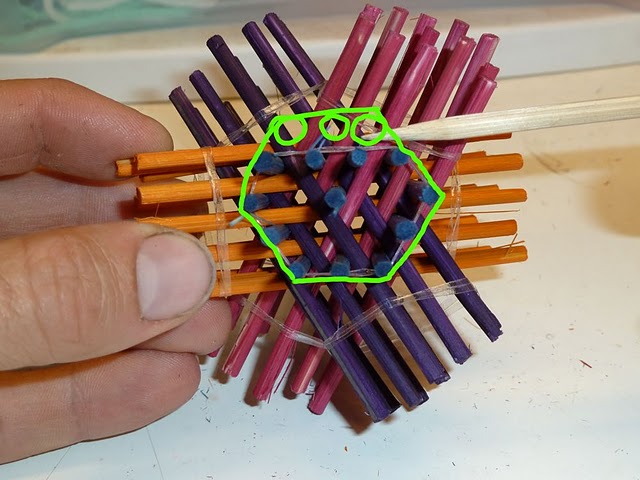
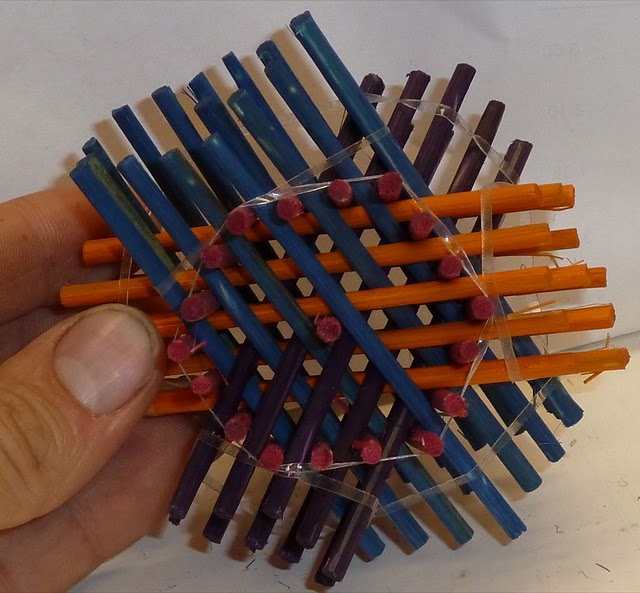
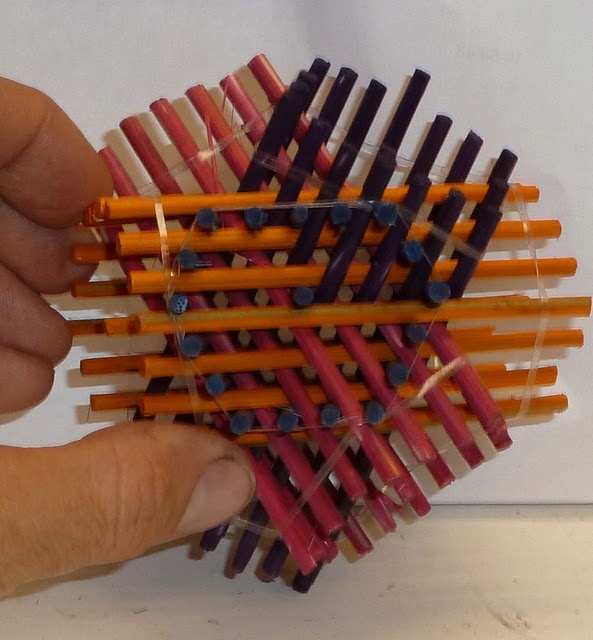
Look down the end of orange and identify the 2,3,2 separations. One of them has blue sticks between the sets, another has purple sticks, and there is one more, shown in white, with no sticks separating the sets of 2,3,2. There is one more way to split the orange sticks into sets of 2,3,2, and that is what the pink sticks do.
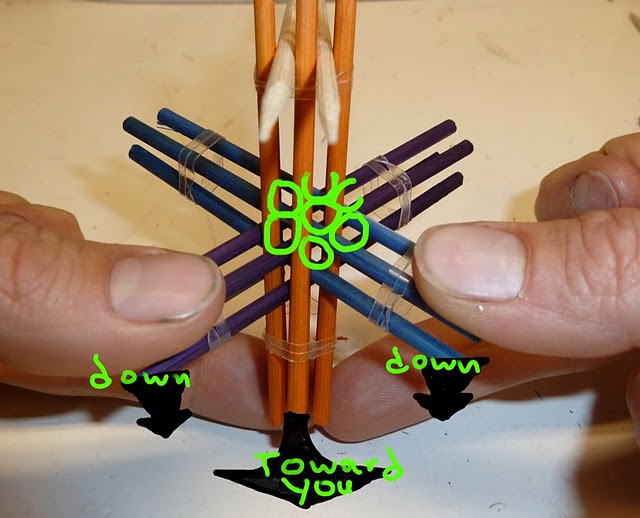
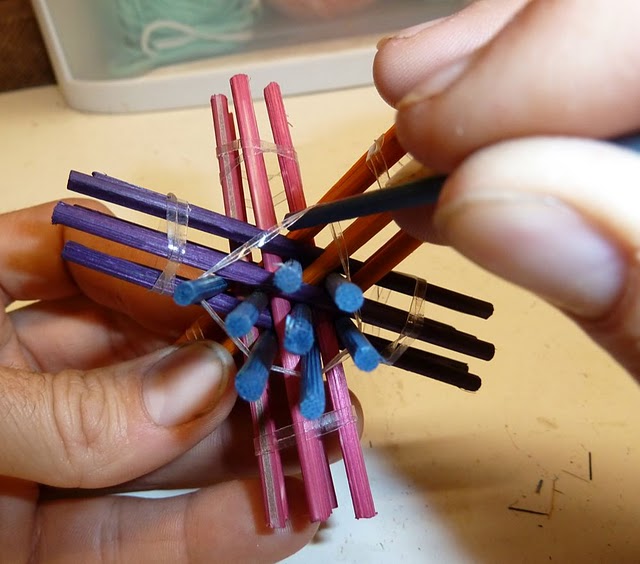
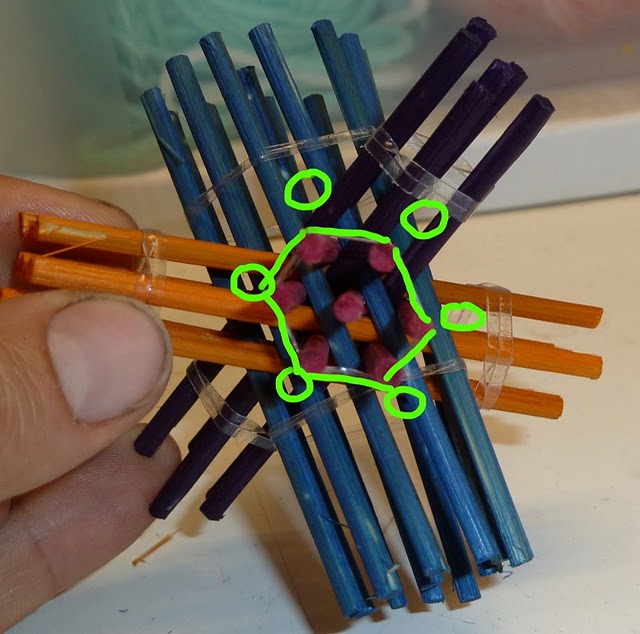
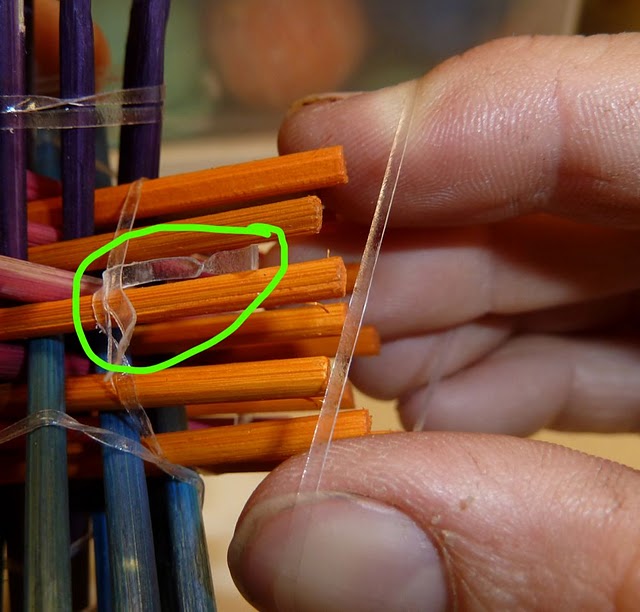
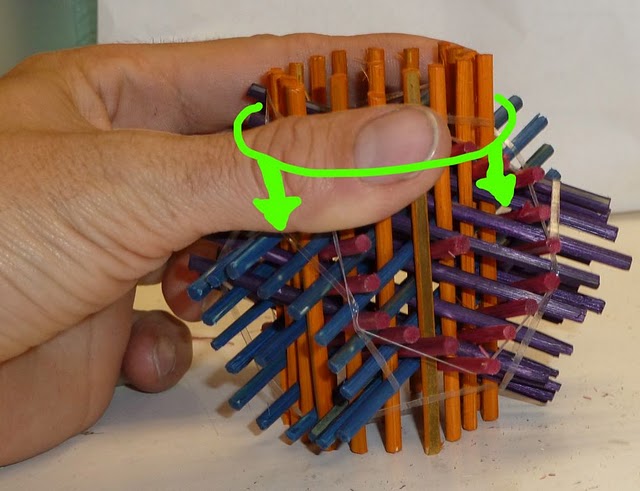
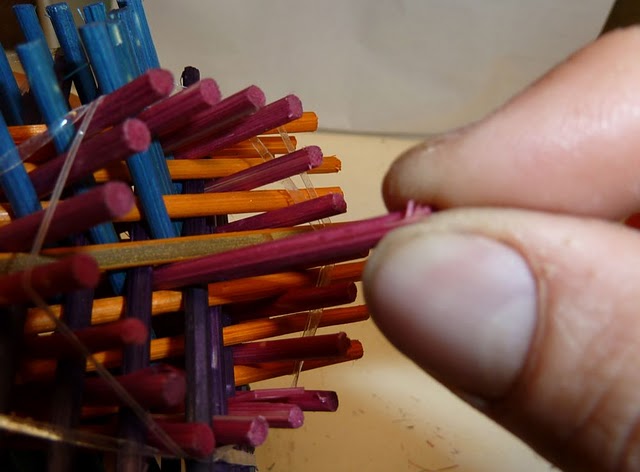
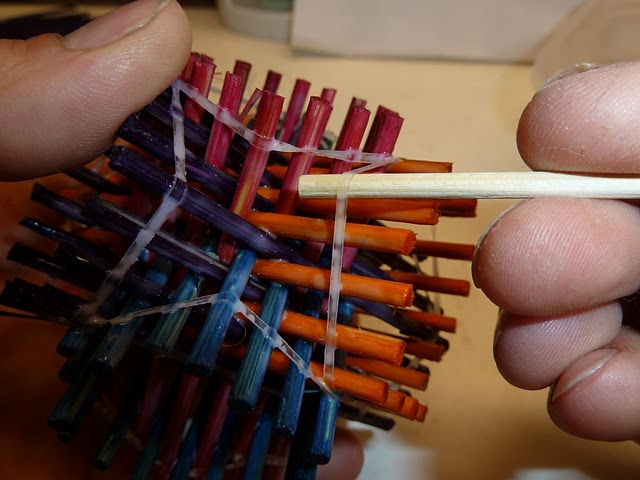
The pink sticks need to alternate properly with blues, and purples too, so there is a trick to inserting them. Rotate the above configuration away from you, so that you now hold orange vertically, looking down the future pink direction. Put your thumbs on the ends of the blue and purple sticks nearest you, and your middle fingers on the bottom end of orange. Pull orange toward you, and push down on the blue and purple sticks. This should reveal six-sided holes for inserting pink!
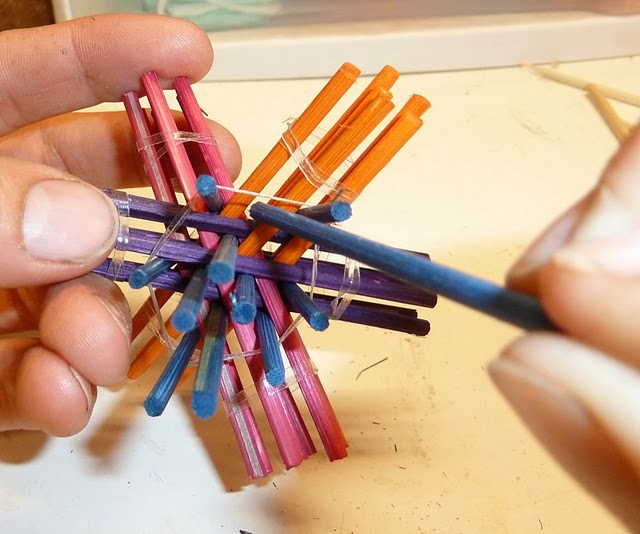
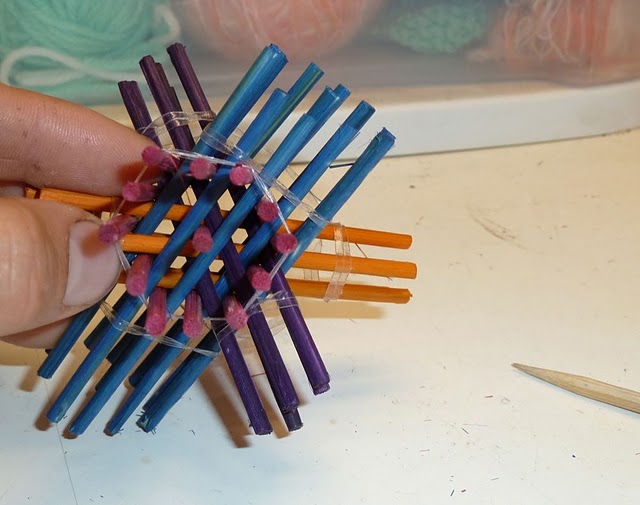
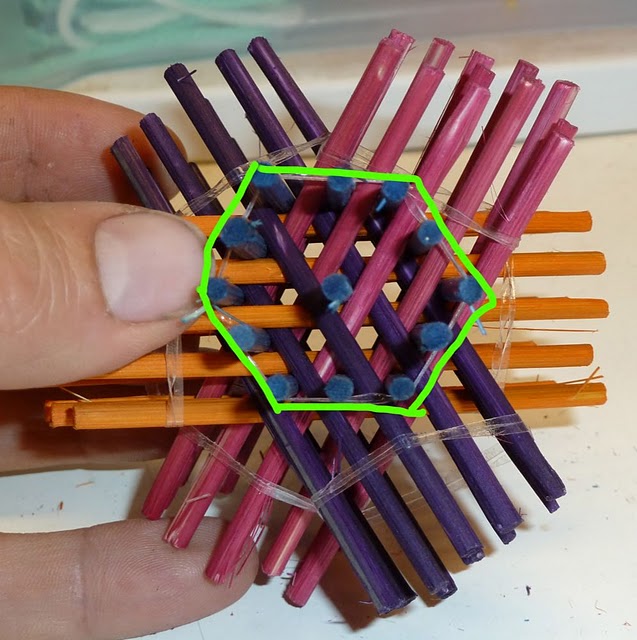
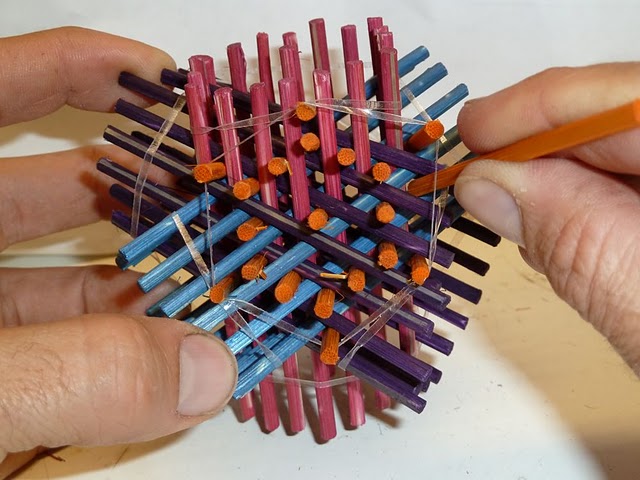
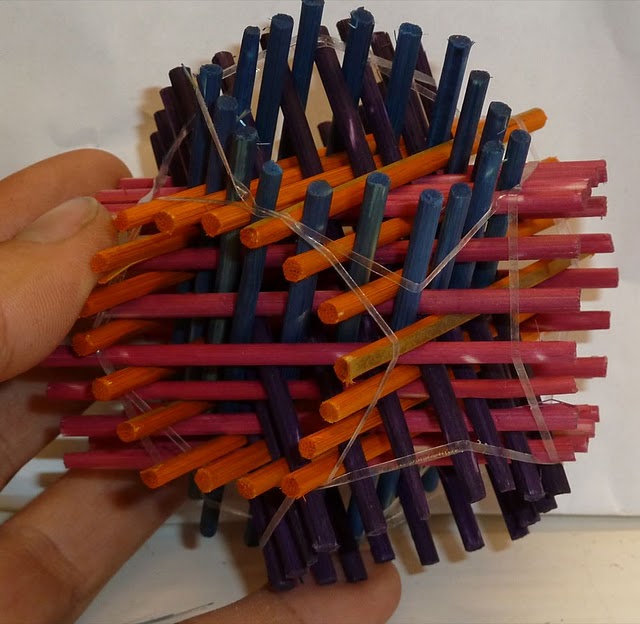
Insert 7 pink sticks into the holes. It does not matter which holes you choose, and it’s OK that some holes are open on one side. Make sure that all pink sticks are parallel to each other.
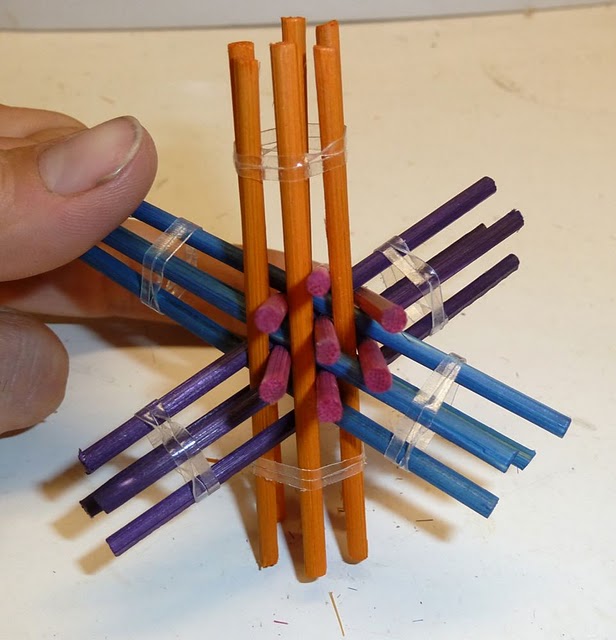
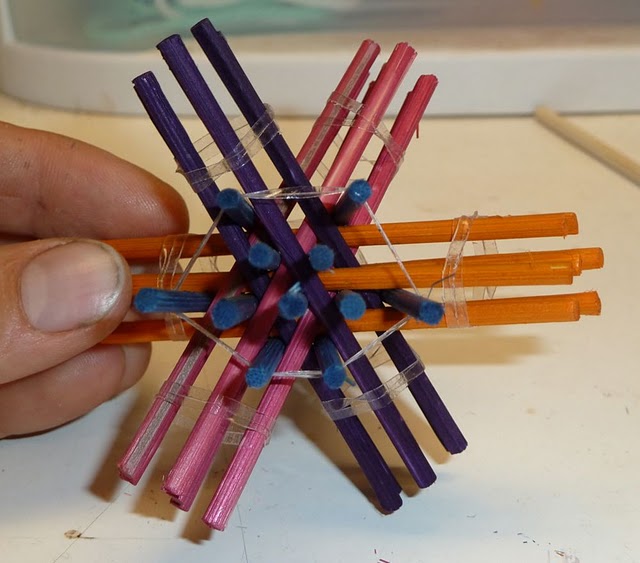
Put elastics around the ends of pink.
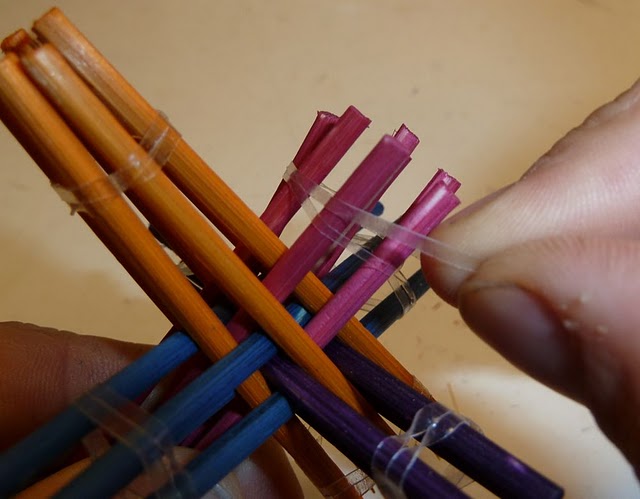
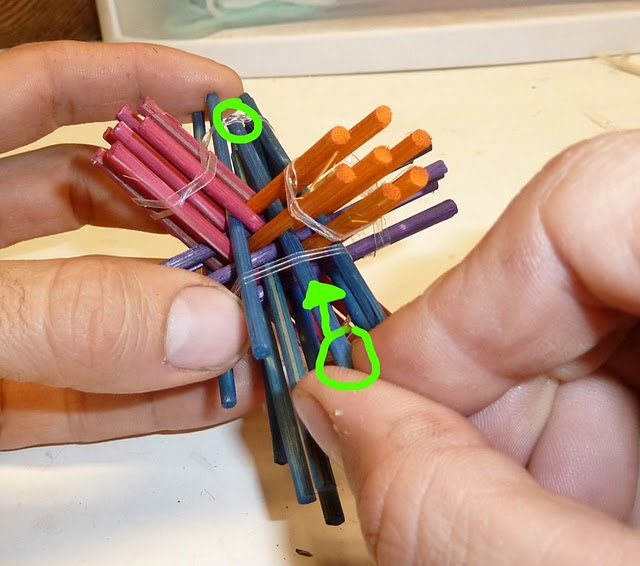
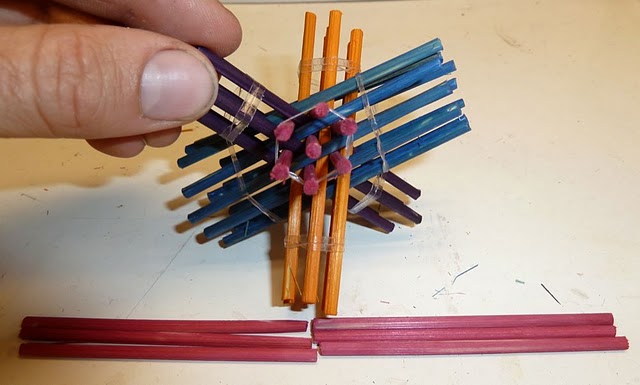
Complete the blue and purple colours by adding three of each stick.
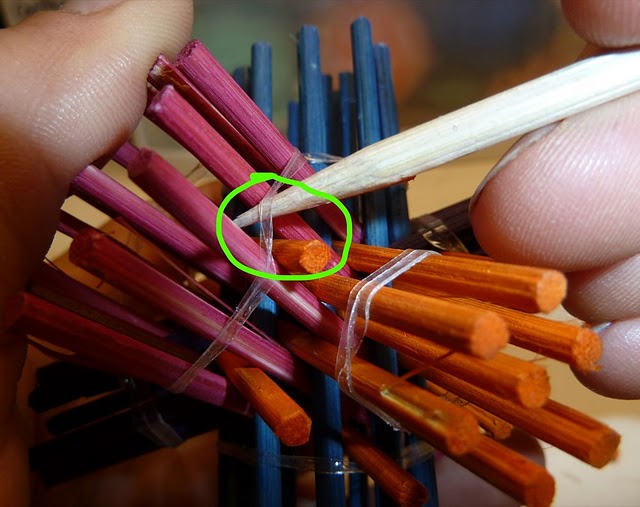
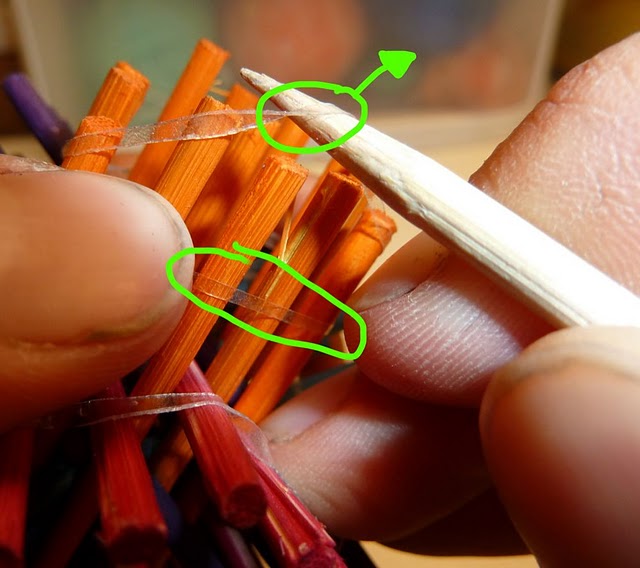
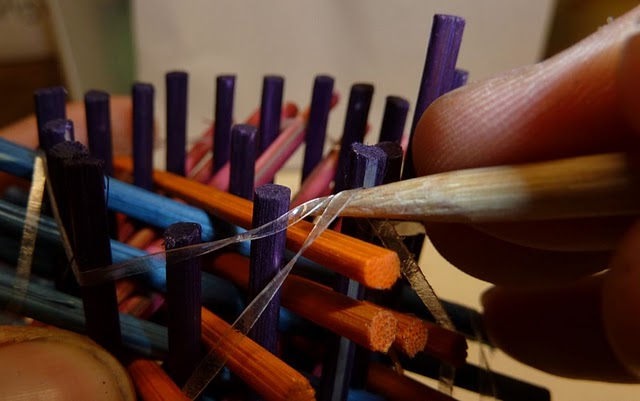
To add a blue stick, tuck it under the elastic, and push it into a hole. As long as it is parallel to the other blues, it is in a valid hole. You need to lift the elastic on the other end with a skewer to tuck the stick under that one too.
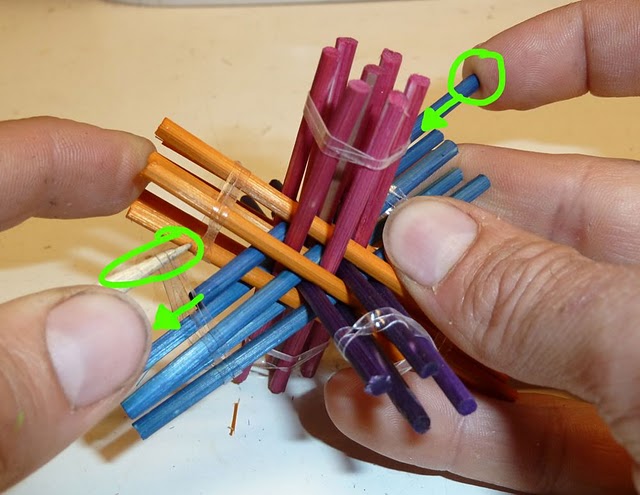
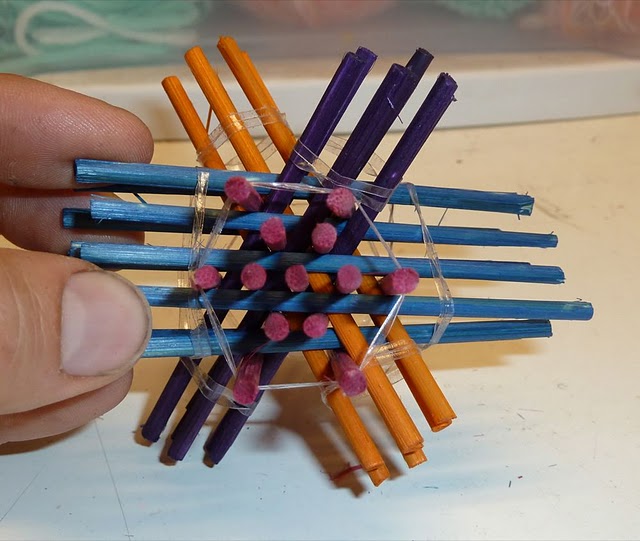
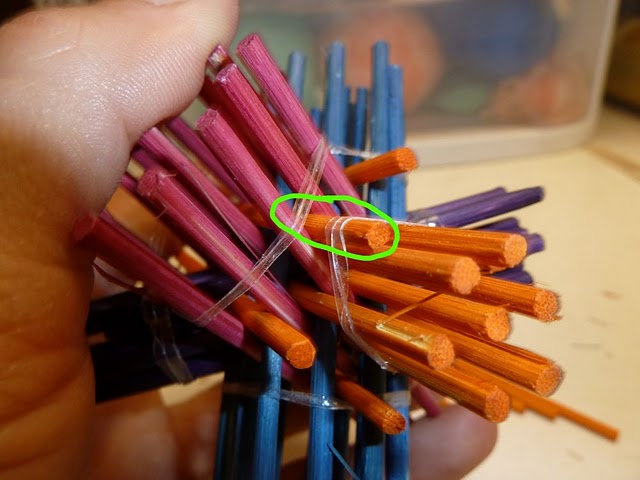
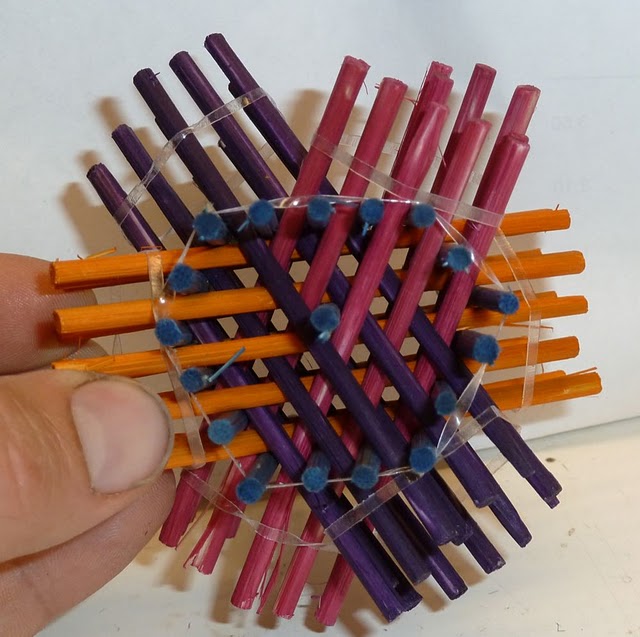
Here is the finished blue. Some blue sticks are not really in “holes”, but that’s OK because they are held in place by the elastics.
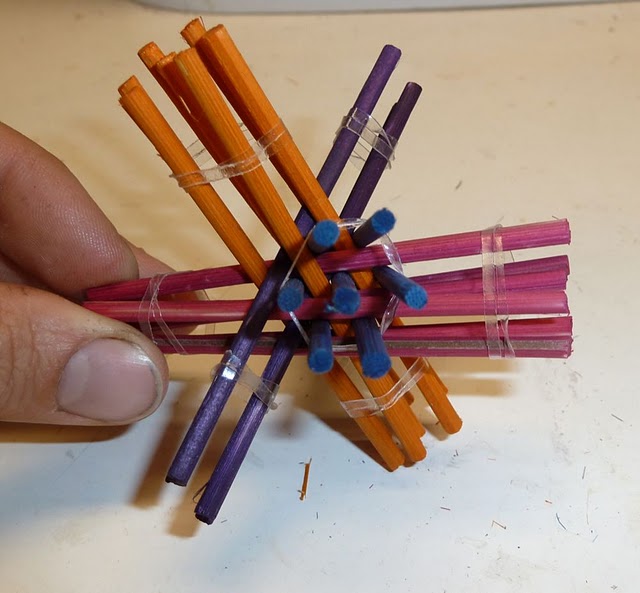
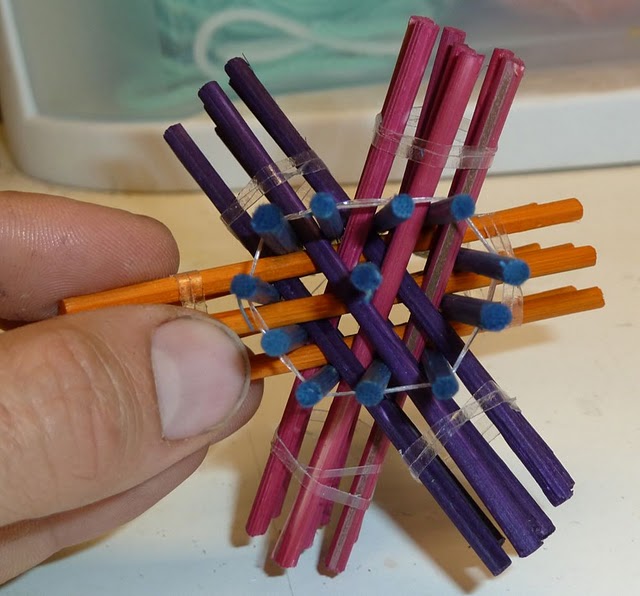
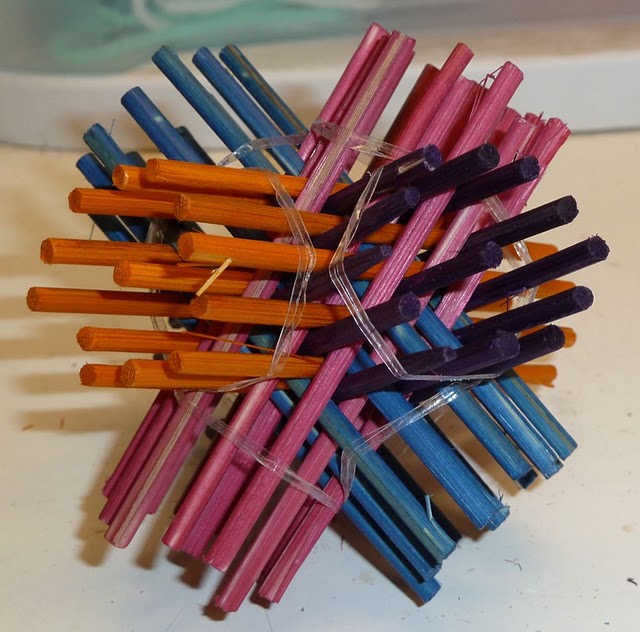
After you have done the same thing with purple, you have constructed a Level 1 Hexastix. Congratulations!
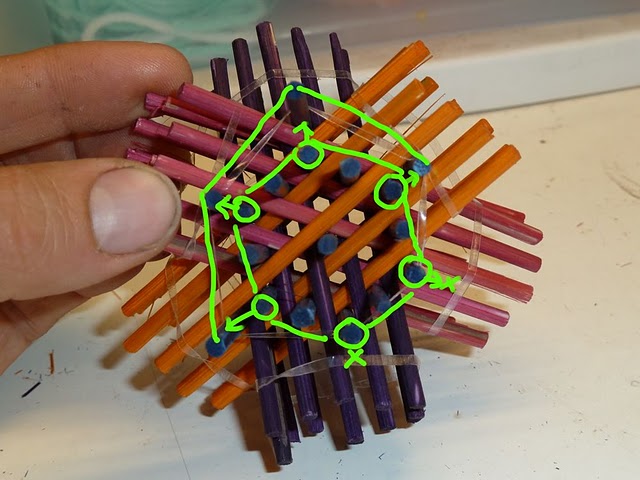
Expand it, starting with blue. You need about 6 blue sticks. The end of blue forms a hexagon, and you will expand it starting with the corners. Locate the hole that is straight out and nearest each corner. Notice that there are two corners that cannot be expanded (marked with x). This always happens with the first colour or two that we expand, and can be fixed later.

Again, tuck the blue stick under the elastic, push it through the hole, and use a skewer to lift the elastic at the other end.
Here is blue with the corners expanded. Next, we expand the sides of blue.
Use extra sticks to build the sides of the hexagon, and then remove sticks from the middle, OR take them from the middle and move them to the outside. Whatever is easiest for you.
Here is the expanded blue. Notice that I have left the original “middle” blue stick. It serves as a reference point later. We will make blue into a regular hexagon after doing the other colours.
You might find a second colour that also can’t be expanded on every corner of the hexagon, like orange here. Keep looking at other colours until you find one that can be expanded on every corner.
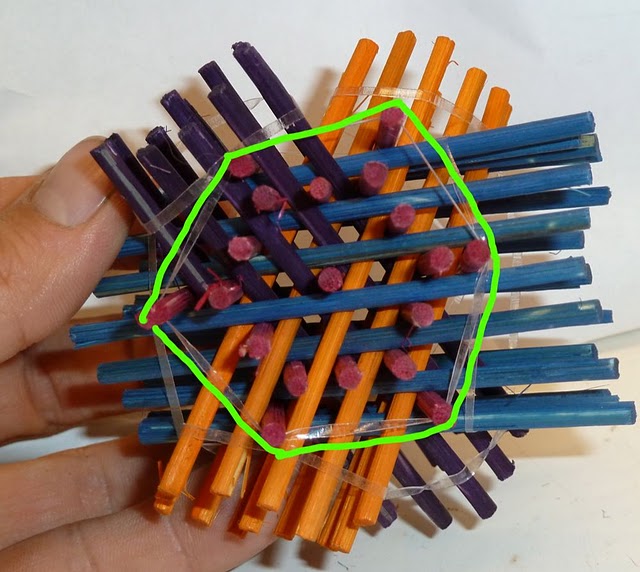
Expand the corners of pink with 6 sticks.
Expand the sides of pink and remove the inner sticks, except the middle one.
Expand orange and purple the same way. As the Hexastix gets larger, you need to be careful that the sticks go under all elastics when you push them through.
When pink, orange, and purple have been expanded, go back and fix blue.
Congratulations! Your Hexastix is now Level 2.
Use the skewer to make your elastics single. Don’t worry if you break an elastic. Just replace it with a new one before removing any others.
Time to expand blue again. And again, there are two places that cannot be expanded yet.
Now expand pink…
Expand orange and purple… Be careful to tuck those sticks UNDER all elastics.
If you need to justify the orange sticks, set the end of orange down on the table, and push the other colours down. Don’t forget to fix blue after expanding all other colours!
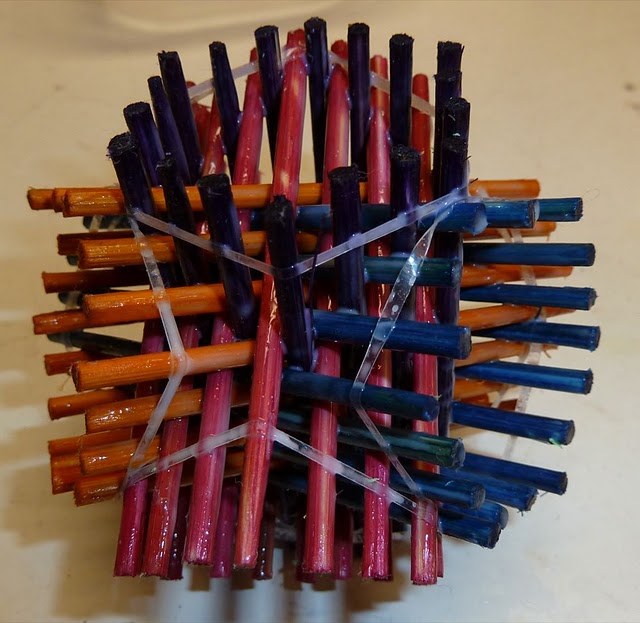
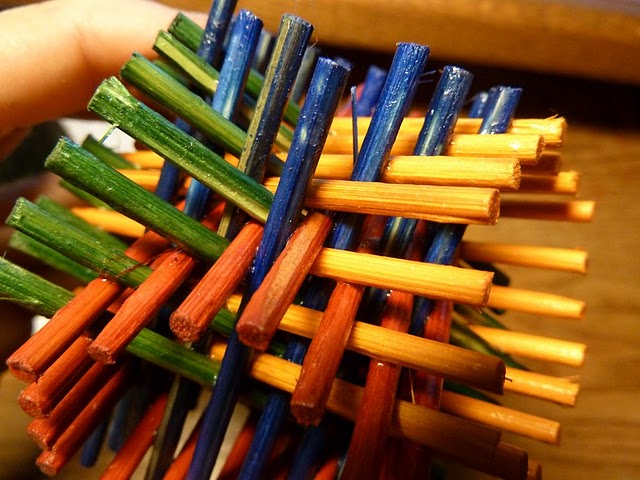
When you cannot expand the Hexastix any more, remove the middle sticks of each colour
Congratulations! You now have a Level 3 Hexastix!
You can leave it this way if you want to, or you can glue it so that the elastics can be removed. If you leave it, keep it out of the sun so that the elastics don’t degrade so fast.
Optional stuff:
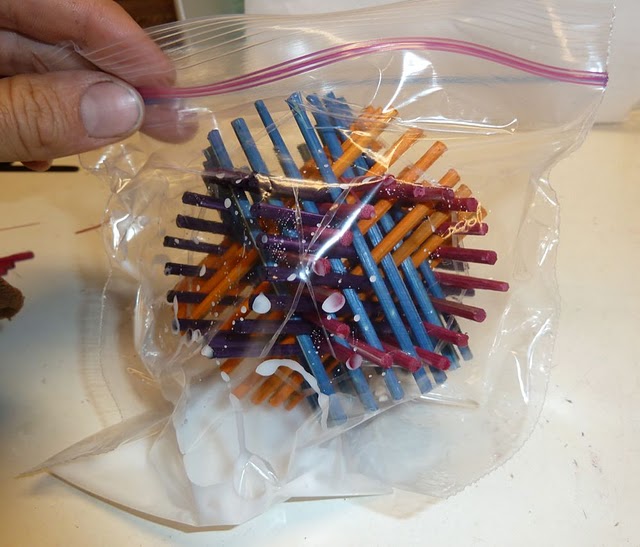
Mix water and white glue so that it is liquidy, but gluie, and put enough of it in a bag to coat the Hexastix. Put the Hexastix in too. Seal the bag and shake it by cupping the Hexastix carefully in your hands. Don’t hit anything with it, or your Hexastix could fall apart! The Hexastix should be coated in glue.

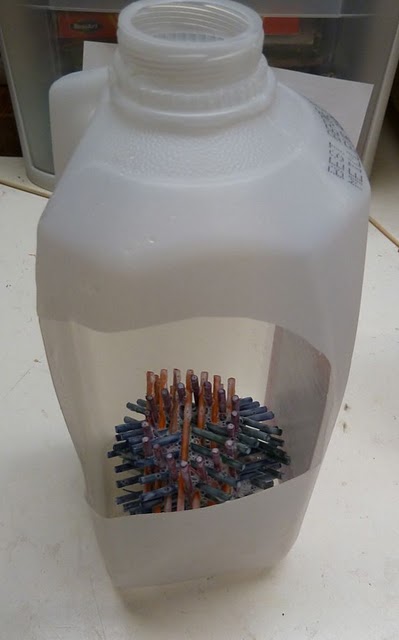
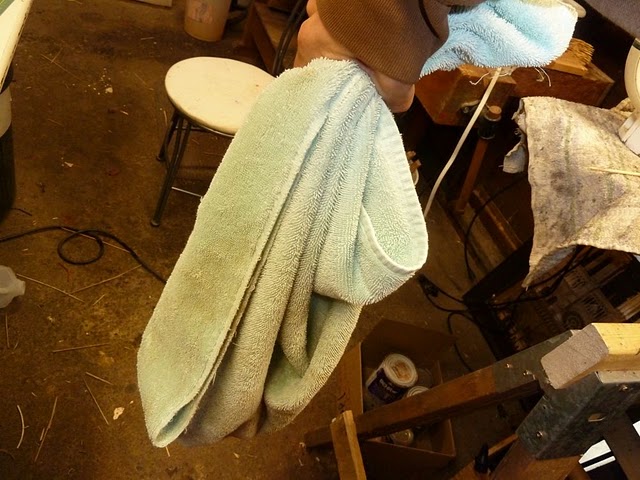
To remove the excess glue, put the Hexastix into a container that you will spin around yourself with a rope. I’ve used a milk jug, with a rope tied to the handle. You can also use an old towel, by holding the four corners. Do the spinning outside, because if you hit something with the Hexastix, it can break.
Make sure there isn’t too much glue under the elastics, because this will make a little mark when it dries. Wipe them with a Q-tip if you really want a nice finish.
When the glue dries, remove the elastics. Be careful here: if you remove them too soon, your Hexastix falls apart and you can’t really fix it because it is clogged with glue, and if you wait too long, your elastics might get stuck. I waited about 12 hours, and the elastics came off but the Hexastix was fragile. If the elastics left a mark that you don’t like, you can do another coat of glue, or acrylic medium (available from art supply stores). Make sure it is extra dry before applying a second coat. The shaking could dislodge a stick if it isn’t dry.

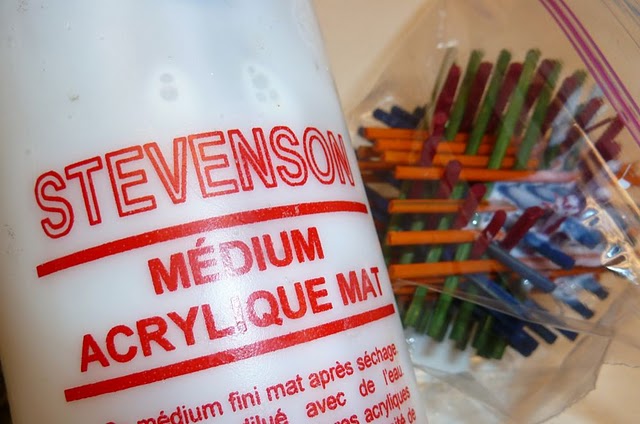
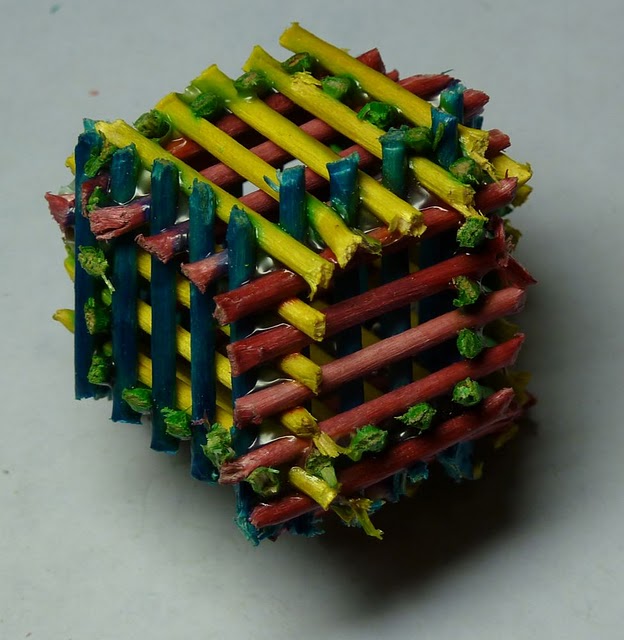
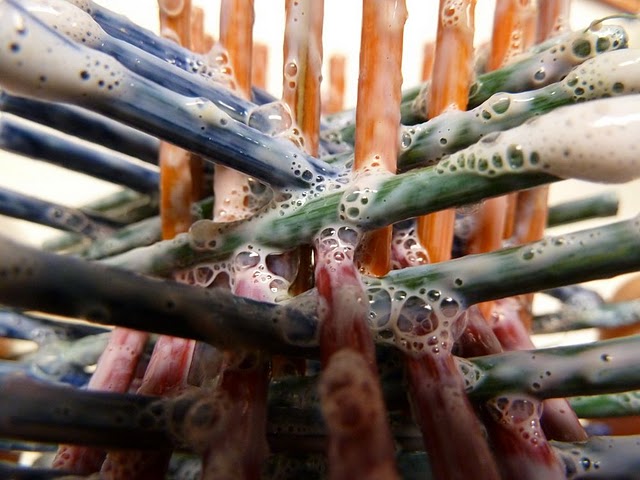
The process is the same for glue-water and acrylic, except that the acrylic medium will make bubbles which you must remove by blowing sharply on them. Here is the finish after applying one coat of glue, and one coat of acrylic medium.
FIN!
In my sculpting endeavours I have needed many coloured sticks of all shapes and sizes.
It was immediately apparent that I would need to
- source skewers in bulk,
- cut them quickly without fraying them,
- and colour them cheaply.
The useful answer to the first item, is that skewers are available in bulk from “box and paper” companies. Next item please.
One of the best tools I have ever purchased is a stack paper cutter from All Image Printing. I got the little 12 inch one for $140, delivered. I see the price has risen considerably. Cutting skewers is just one thing I have done with this.

Lastly, I use RIT Dye to colour them. The colours are beautifully strong, and the process is quite simple.

Here is a picture of part of my latest project; colouring 15,000 sticks, each 3 inches in length. This project is for a bulk order, where I will facilitate several more Hexastix activities, like the one I did at Math Camp, at the University of Victoria, in Summer 2011.
I have wanted to busk for many years, but lacking the skills of a musician and the bravado of a circus performer, I would need something different. Doing things differently is my specialty, however, and with the good fortune of finding a free typewriter on the street, I began to incubate ideas.
I had seen and heard of busking typewriters in Victoria, but their performances lacked luster, they wore no costume, and THEY WERE ONLY PRETENDING TO TYPE. Making money is important to me, both as an encouragement and financial incentive, I wanted people to engage with me and be entertained.
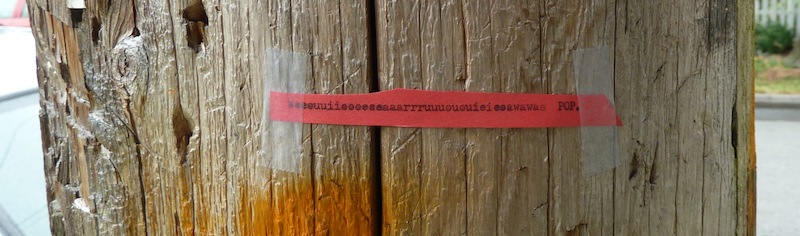
After considering writing nonsense, and love poems, I decided on writing insults. Nonsense was dispensed with easily, because frankly, most people don't get it. Why would someone write nonsense like "your socks are untied" and hand it to someone? That stuff does much better taped to telephone poles, and bathroom stalls.
The love poem idea died more slowly, but after sitting down and trying to write a SHORT "love" poem, I realized that it is a contradiction in terms. A love letter or poem's object is to keep someones attention, often through flowery language and stream of thought. Short ones do exist, I'm sure of it, but they are overcoming a handicap and, in spite of being short of words, they still linger in thought. My talent does not extend so far as to write short love poems. Besides, I want people to laugh with me for a moment, leave a few coins, and depart.
Insults were chosen, therefore, by elimination. I'm not funny enough to go around insulting strangers and have them pay me, so I looked around the internet and found this Shakespearean insult generator. It's perfect, the insults are even in iambic pentameter, and they are safe for kids. Now I have a quick and easy source of material, and I can focus on the presentation.
The following things seemed useful:
- A cool old suite case for my materials, which doubles as a table top
- A costume with a 1920s look
- Sign making materials like Jiffy markers, paper and tape
- A lamp for nocturnal insults
- Water, coffee, a cell phone, and a ride to the venue
- A couple of random props and gadgets to attract attention
- A light stool and table
- A busker's license ($25 from city hall)
- A money bin
